|
|
Post by mxdave on Mar 30, 2023 17:34:31 GMT
Having got myself an ND Z-Sport one of the first upgrades I wanted to do was upgrade the infotainment system to use Apple CarPlay. After extensive searches on the interweb and finding numerous posts on various forums explaining how to do it I decided to take up the challenge. The first thing that needed doing was to upgrade the firmware in the system. I had learnt that it needs to be on at least 70.00.100A for CP to work mine was on 59.00.540. I managed to get a link to the relevant updates files for 70.00.100A and the latest version 74.00.324 and detailed instruction on the update procedure. The other thing I needed was the hardware, which comprises of a new USB/Aux hub and two cables that replace the one cable that goes between the CMU (head unit) and the existing hub. I bought mine from Amazon with next day delivery, basically because I’m impatient. There are cheaper ones available on eBay and other sites but the delivery is from China, where, incidentally, they all come from even the ones that are supplied by your Mazda main dealer. You pay your money and take your choice. So, I ordered the hub and leads kit from Amazon and at the same time I ordered a 32Gb mini USB stick, needed to put the files on for the update (which I have now put loads of music on to play in the car) and a set of trim removal tools for ripping the interior apart, although the trim in the MX5 comes apart very easily and I didn’t really need to use the tools much. Here’s the kit I bought. 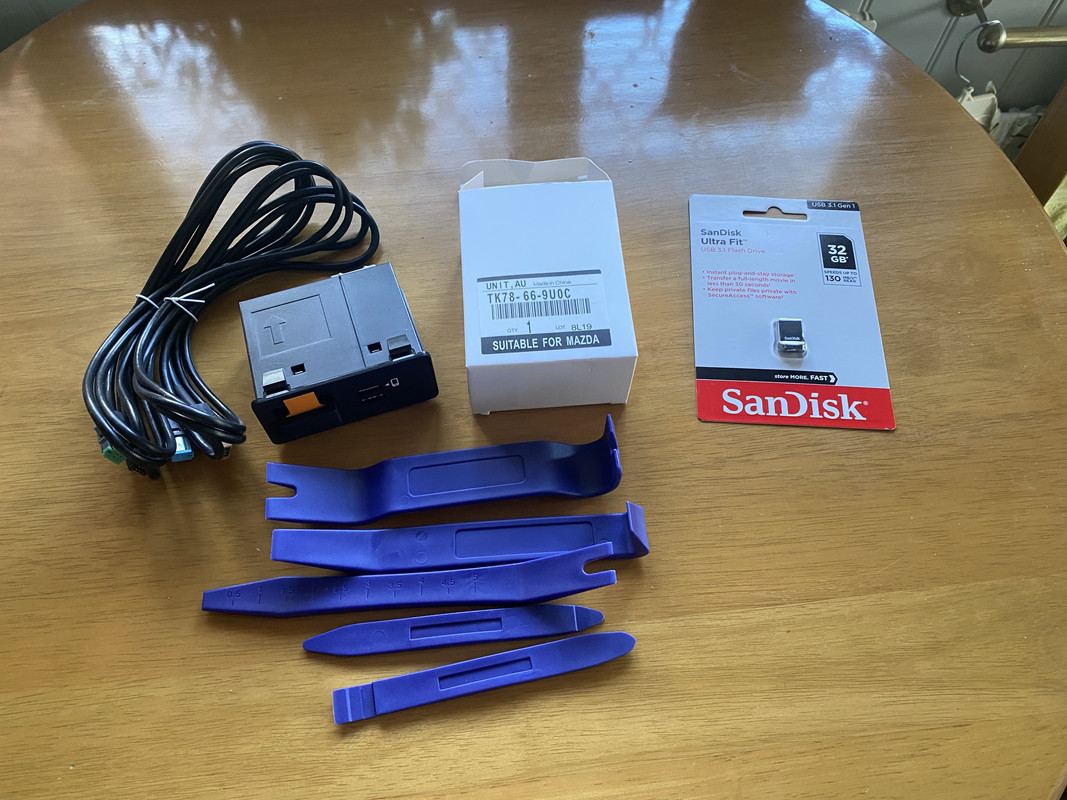 So, the first job was to update the firmware. When you read the instruction this can look very intimidating especially when you read all the warnings but in reality it went very well. The only thing you need to make sure of is that you press the clutch pedal down roughly every 20 minutes. The power will go off after 25 mins and this will crash the update and probably be unrecoverable. So armed with the files on my USB stick and my phone to set a 20 minute reminded I sat in the car and performed the updates. First update to 70.00.100 and then to 74.00.324. The first took around 40 mins and the final update around 55 mins. That’s a long time for me to be sitting still and I was busting for a pee at the end of each one. So we went from this. 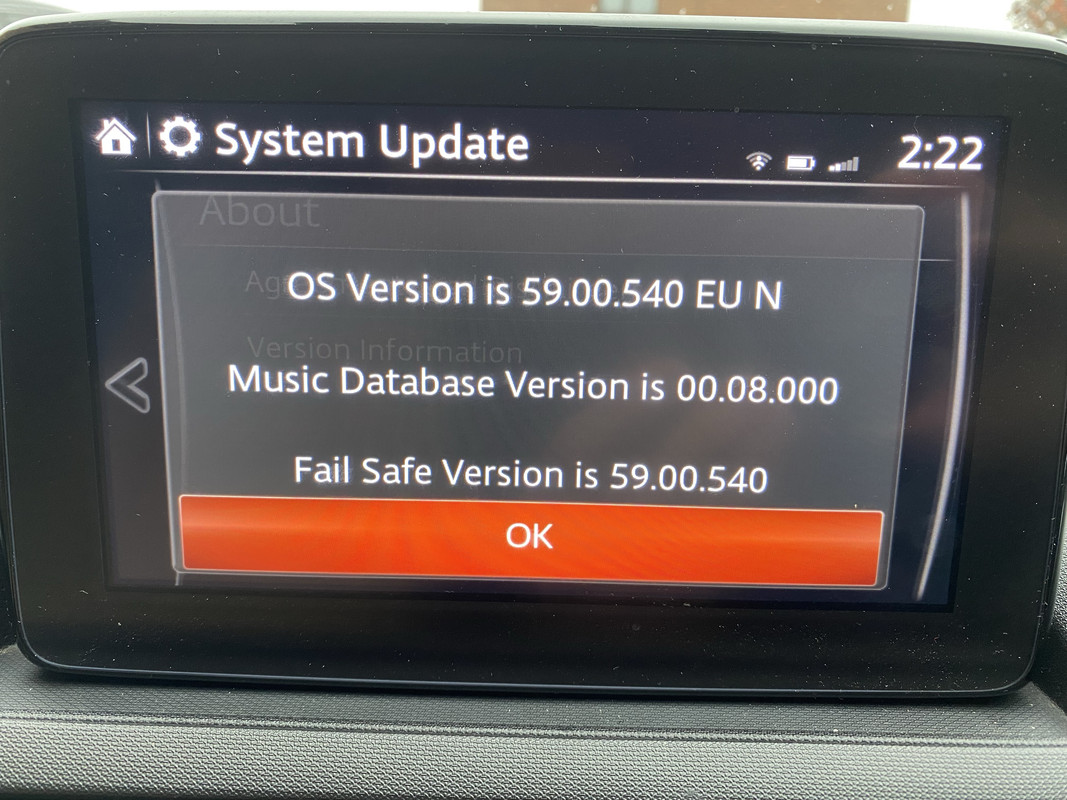 To this. 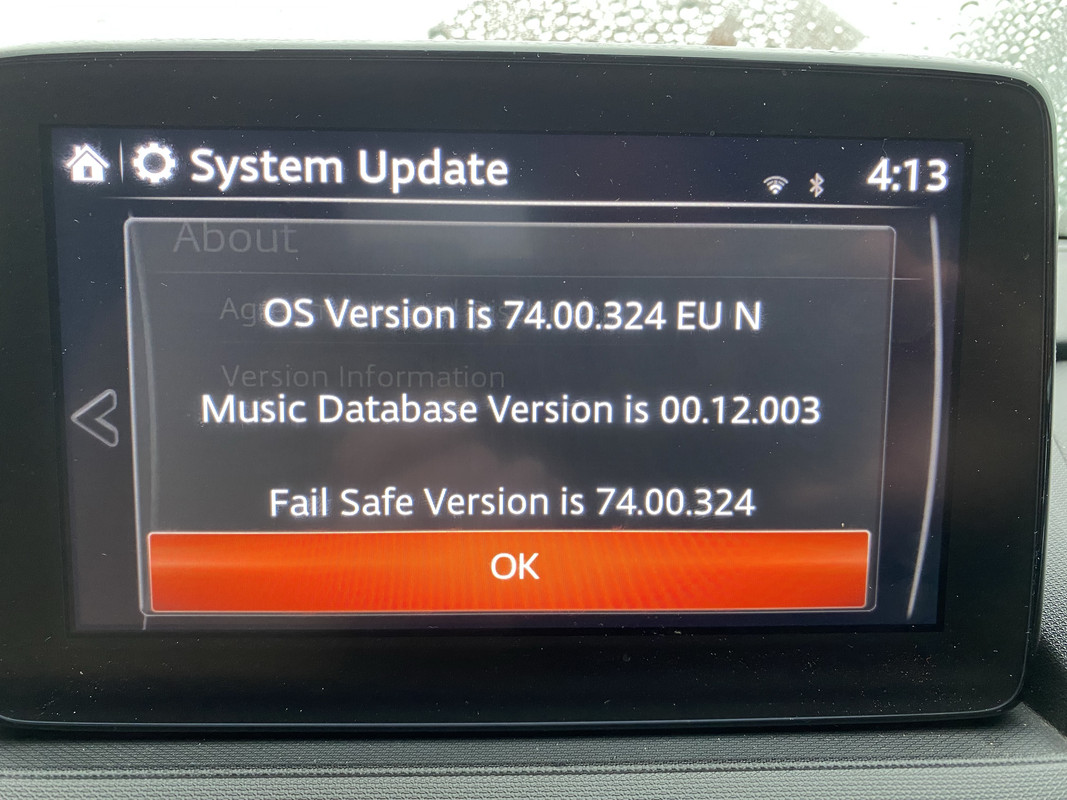 The first thing I needed to do was to prepare the two new cables. The kit comes with everything you need including sticky back foam pads to wrap around the cables and cable ties to tie back the cables. Here’s the instructions. 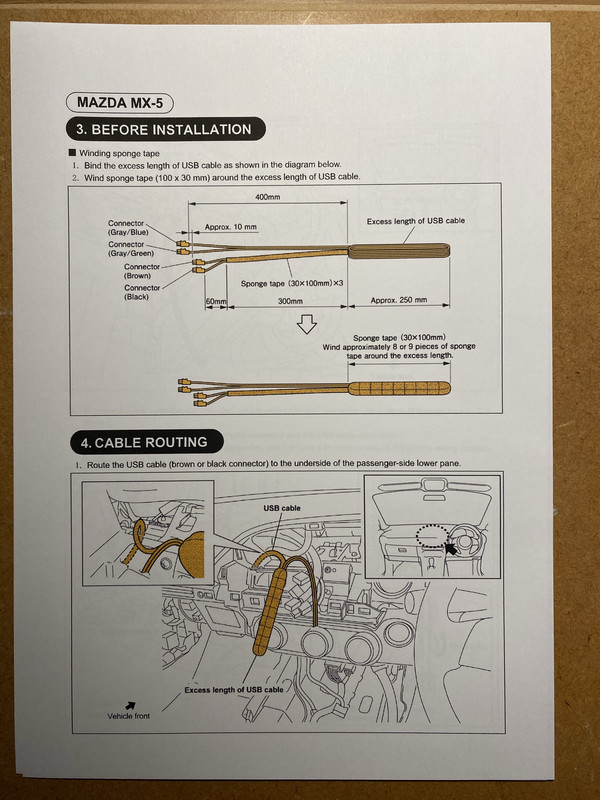 |
|
|
|
Post by mxdave on Mar 30, 2023 17:36:43 GMT
The next job was to install the hub. Before starting remove your SD card from the slot in the existing USB/Aux hub. You’ll need to swap this into the new hub. So, to start removing trim from the car. All trim removes very easily by pulling or prying. Everything is just clipped on. There is just one trim clip to remove and two 10mm bolts. I used a jar to save these in, didn’t want them getting lost. 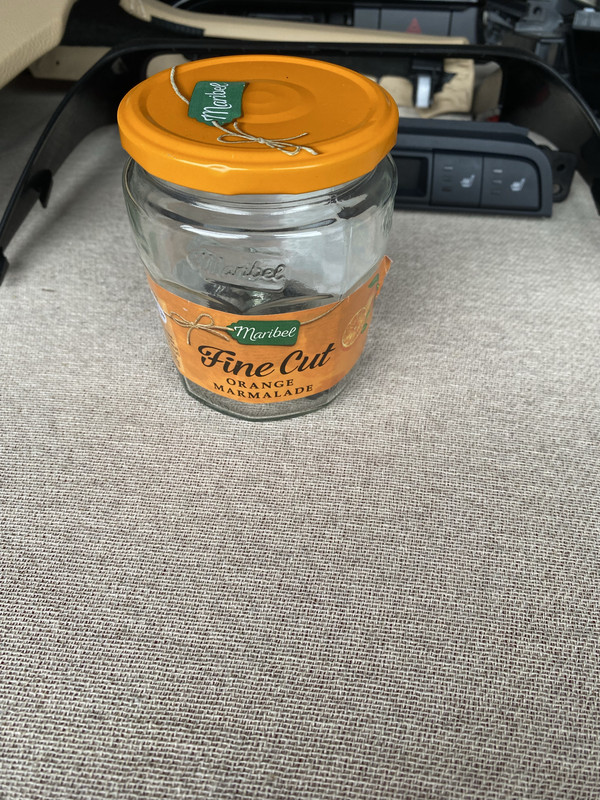 First was the sill trim on the passenger side. 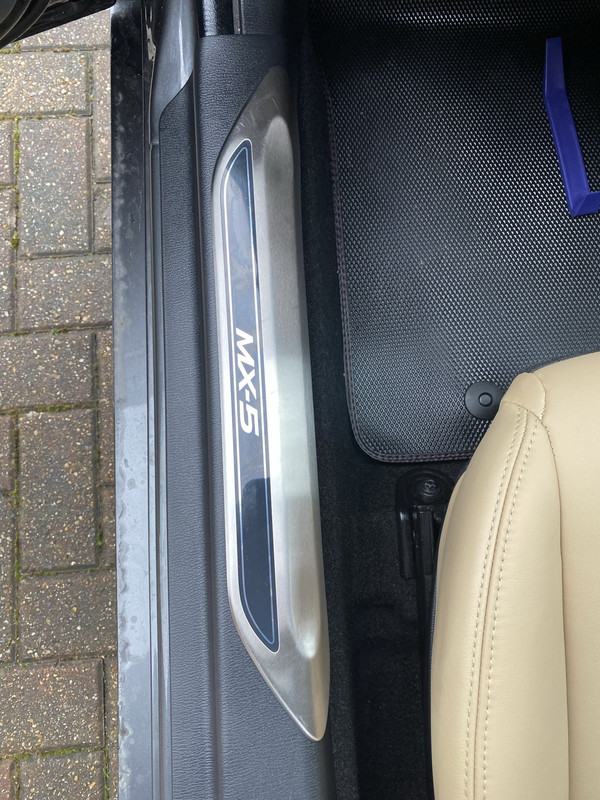 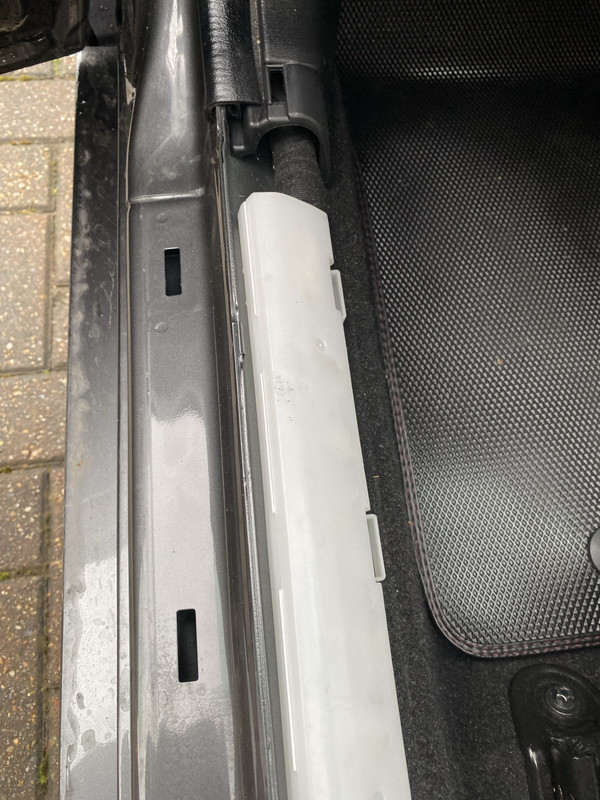 Next was to remove the rubber seal around the front of the door opening and then the cover over the fuse box. This is easily done by removing one trim clip in the front of the trim and pulling backwards where it wraps around the door opening and there is one clip that just pull out. 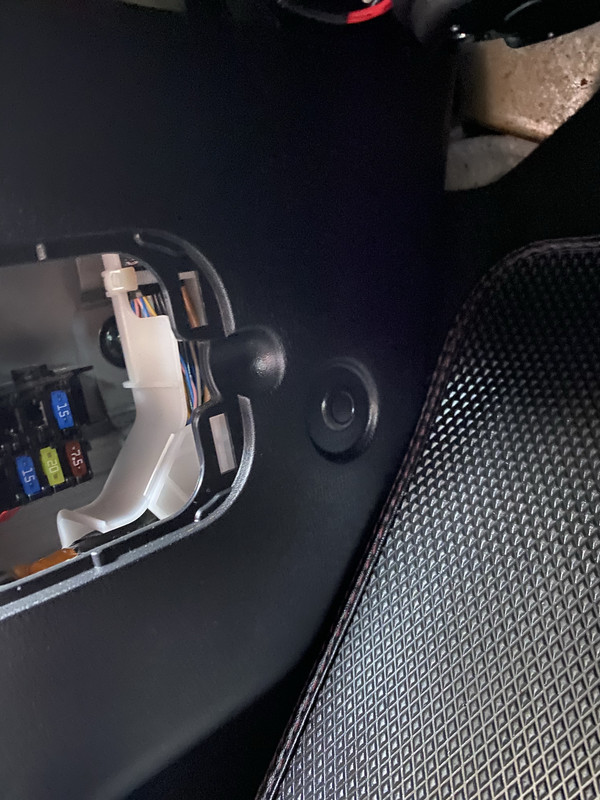  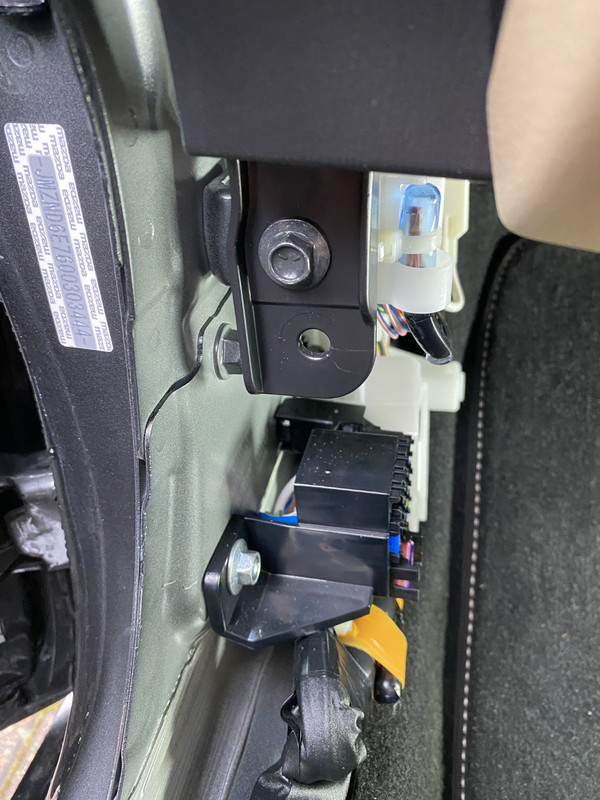 Next is the A-pillar trim. Again this needs to be pulled or pryed off at the top, there is one strongish clip about half way down and then this trim can be lifted up to release the “tongues” at the bottom. 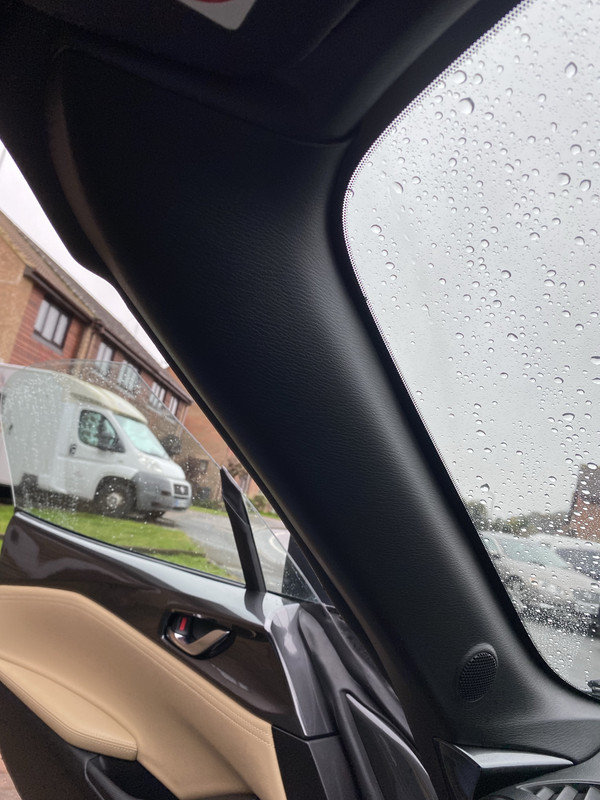 There’s a speaker at the bottom of this so rather than trying to remove it I just laid it on the top of the dashboard. 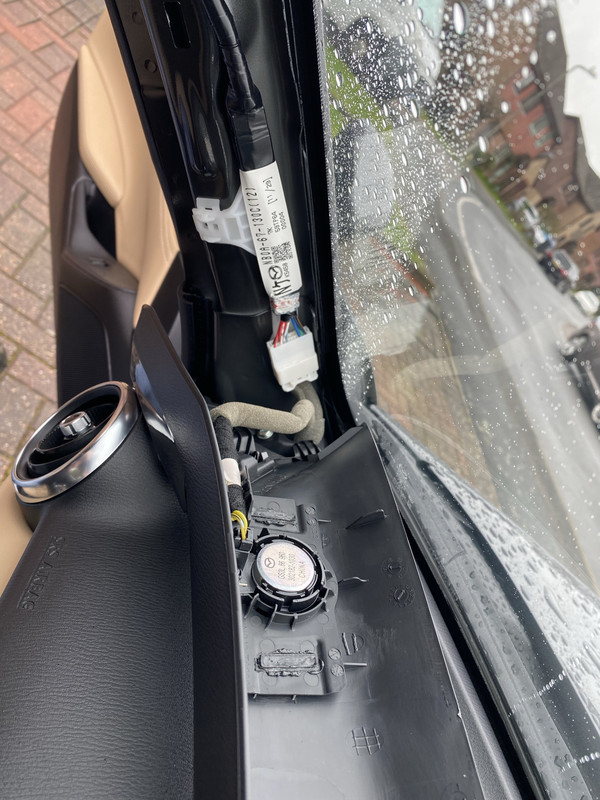 Next is to remove one bolt that holds the end of the dashboard. 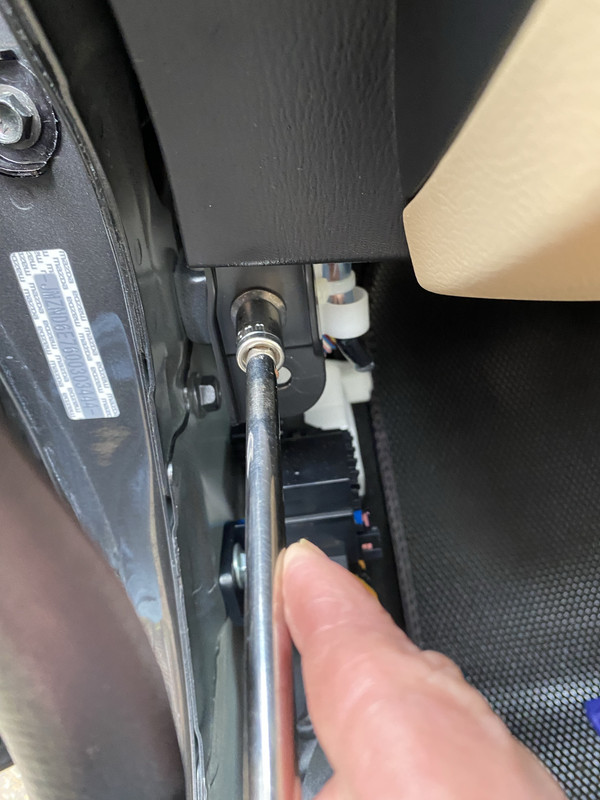 Once this is done you can start to pull off the end of the dashboard front trim. 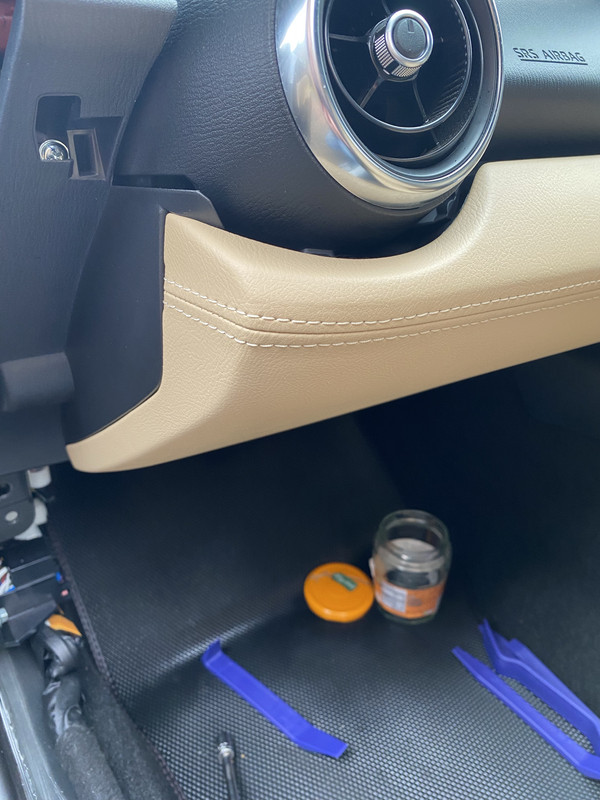 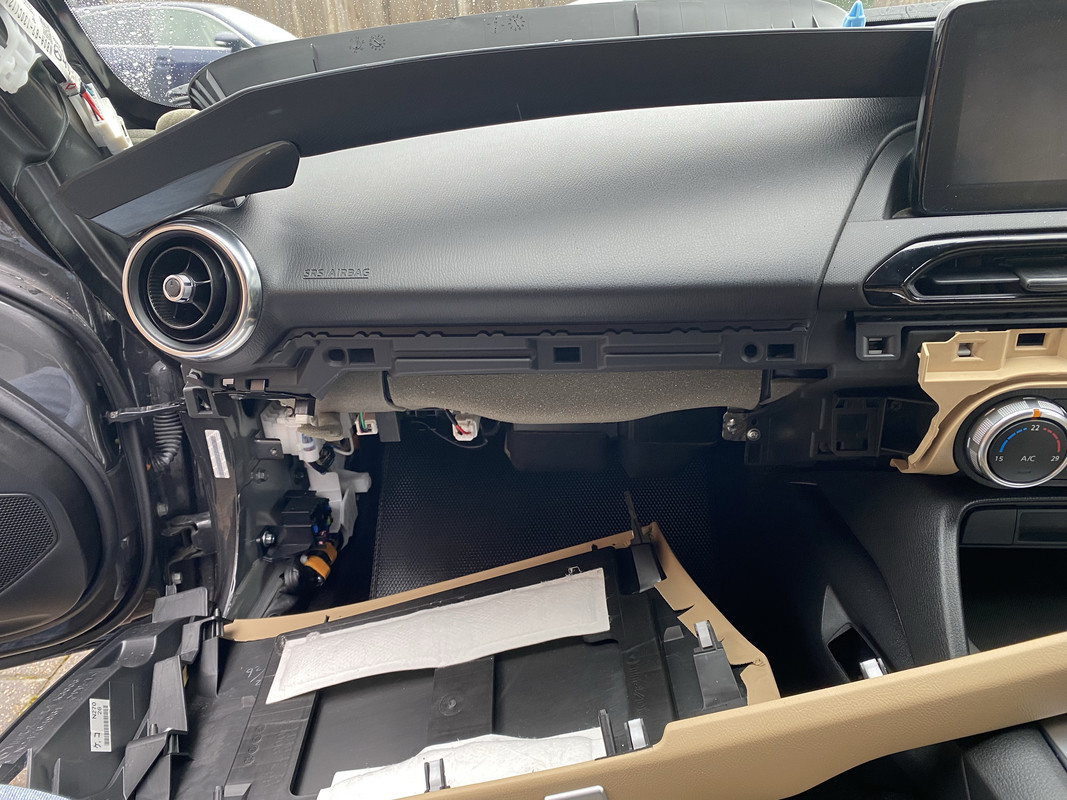 You can see in this photo some of the clips that hold it on...  Next you need to remove the trim under the screen that holds the hazard button. 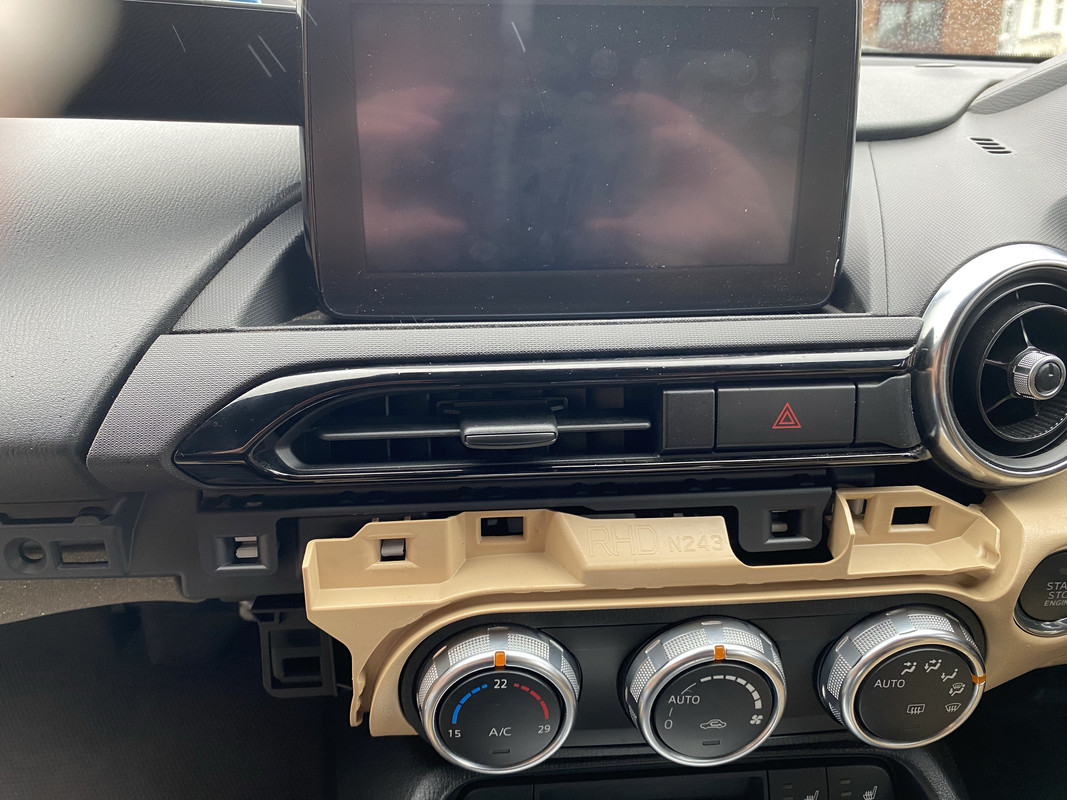 Again this just pulls off, I used a trim removal tool just help get started, and then disconnect the wire to the hazard button. 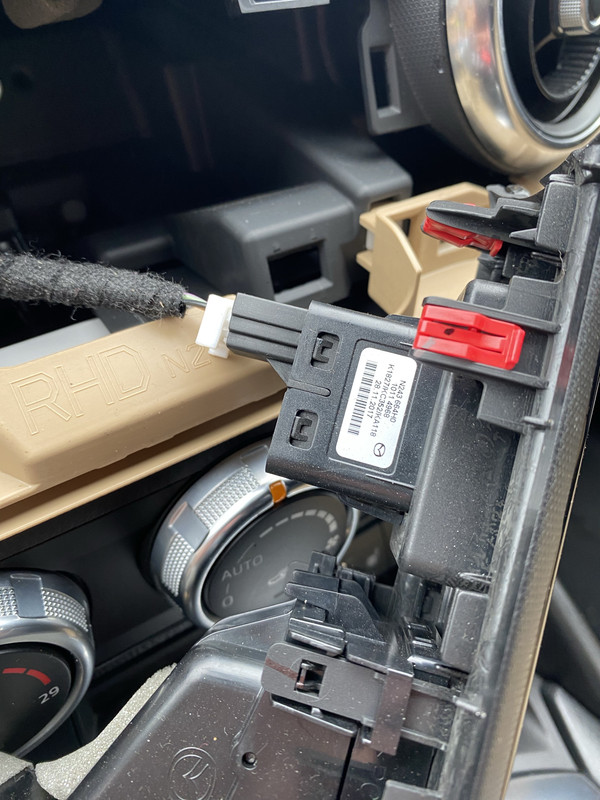 Next I removed the trim above the USB/Aux hub, again this just pulled off.  Once this is removed you can see two screws that need to be removed so that you can remove the panel above the USB/Aux hub which has the passenger airbag display and the heated seats switches. Don’t forget to reconnect these wires when putting it all back. I know someone, who shall remain nameless, who forgot to and when power was restored it set off all sorts of alarms. 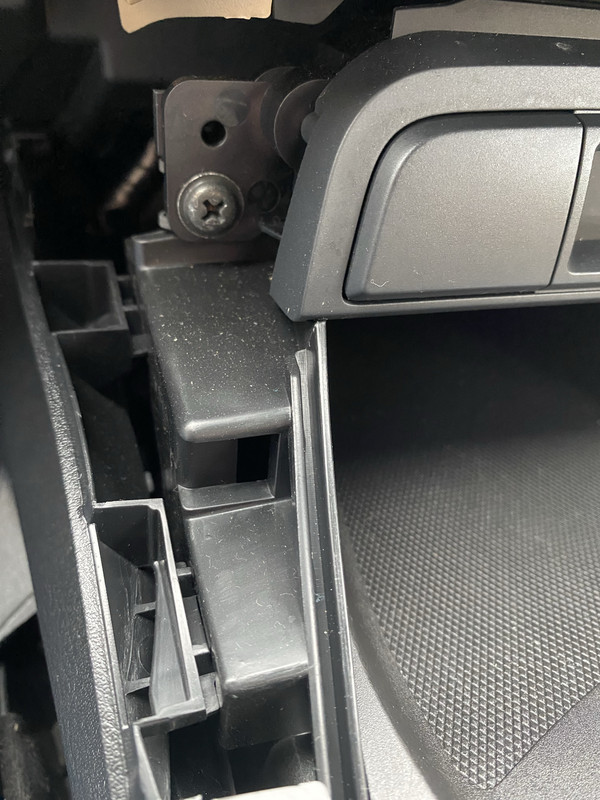  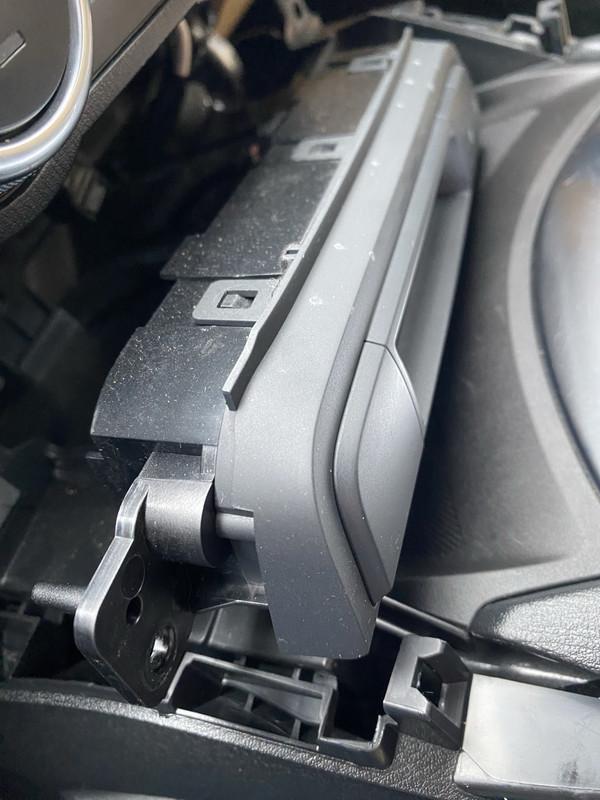 |
|
|
|
Post by mxdave on Mar 30, 2023 17:38:31 GMT
Next to remove the trim around the gear stick, after removing your knob. Again this just lifts up (with some force). You can just get your fingers in where the gear stick gaiter goes under the trim and pull from here. 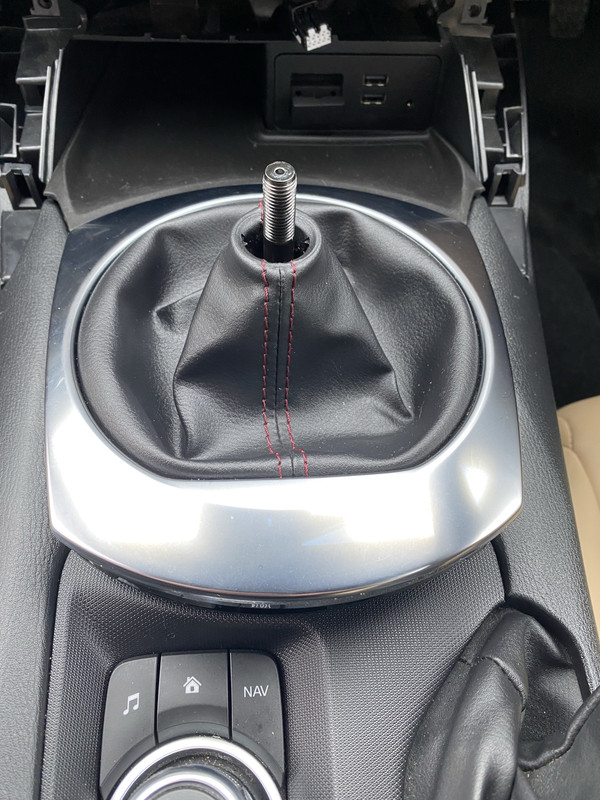 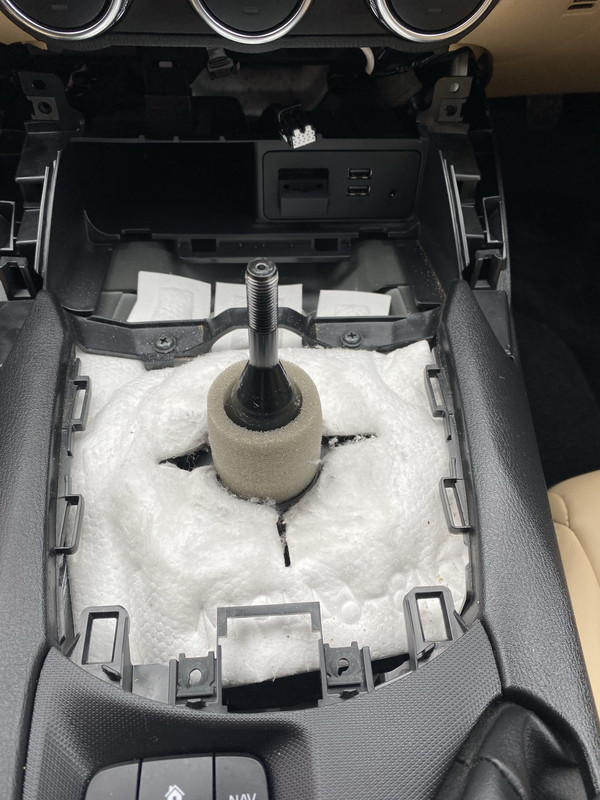 You then need to remove two screws holding the front of the bit that houses the rotary control and switches and then pull up on the front of this panel. I found I didn’t need to complety remove this panel like others have, I just needed to lift the front end to allow the next bit of trim to be removed. 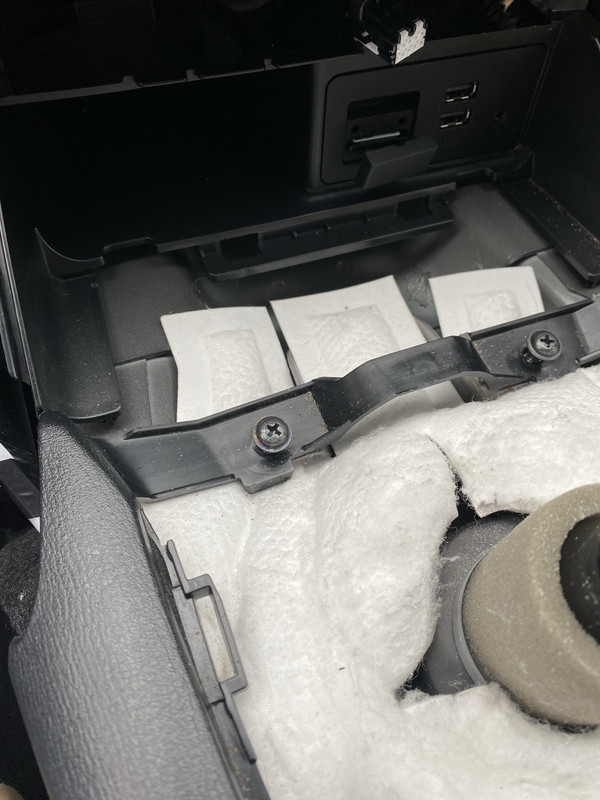 Once this is done the two side cheeks need to be removed by lifting the front of the centre panel, pulling the back edge of the side cheeks towards the outside of the car and then sliding the front out towards the back of the car. There are a couple of plastic tongues that go into slots at the front. Don’t try to pull the whole cheek towards the outside of the car as you will break the tongues.  You can now pull out the part with the USB/Aux hub and disconnect the wires from this. This is the bit that we are replacing.  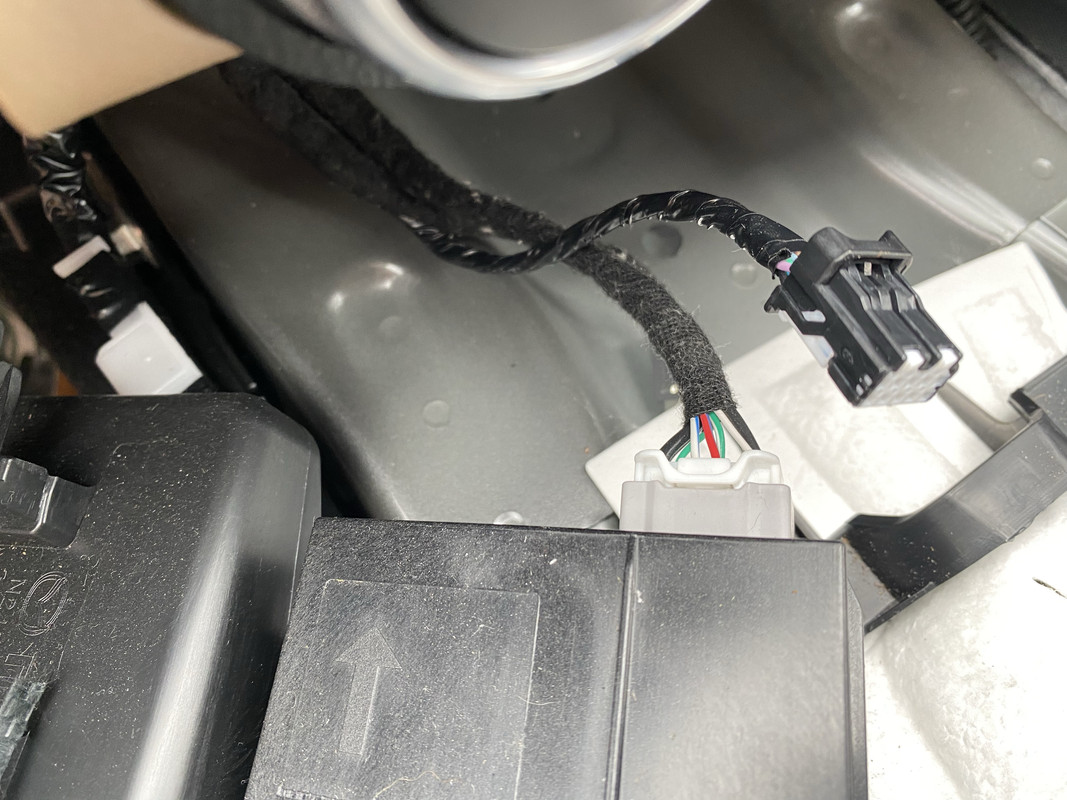 Next it’s back up to the display area. You need to pull out the end of the instrument cowl with the dashboard vent. I found that I only needed to pull this end out a small distance to allow the head unit and display to clear. Some people have removed the whole thing which also needs the wire to the dash mounted microphone disconnected. 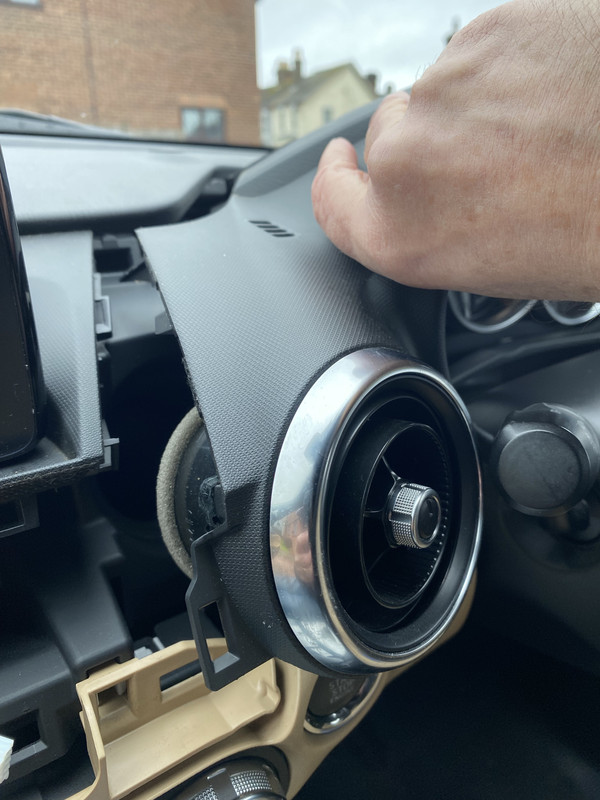 Next is to undo a 10mm bolt that holds the head unit/display in. You will need a 10mm socket on an extension bar. Be very careful at this point that you don’t drop either the socket or the bolt down in the dashboard I’d imagine that it is very difficult to retrieve. I didn’t by the way. 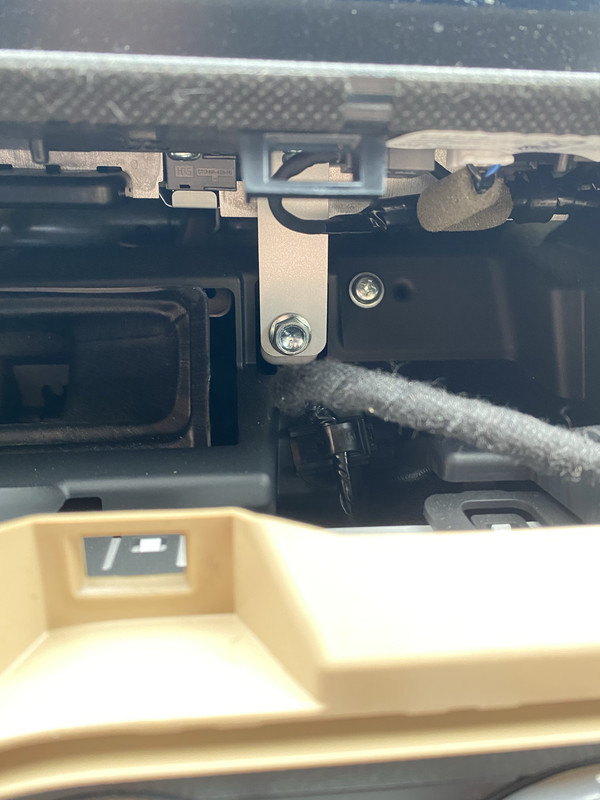 Once this is removed the head unit/screen can be pulled free and then the wires at the back disconnected. 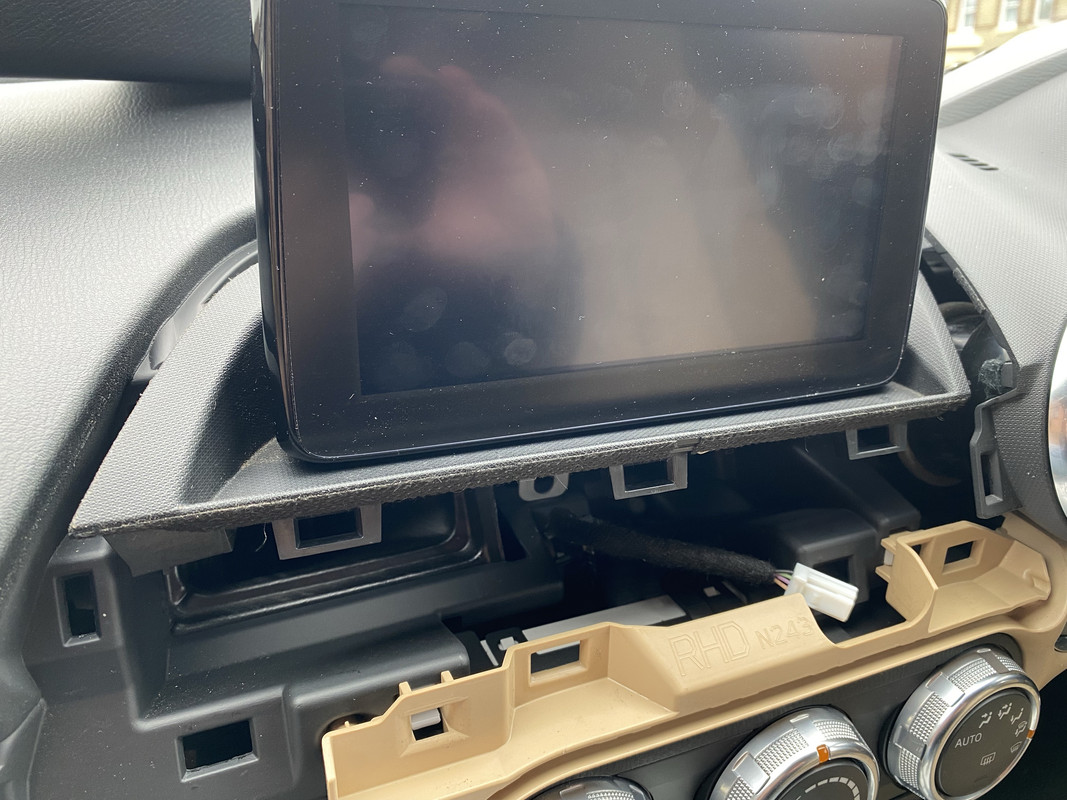 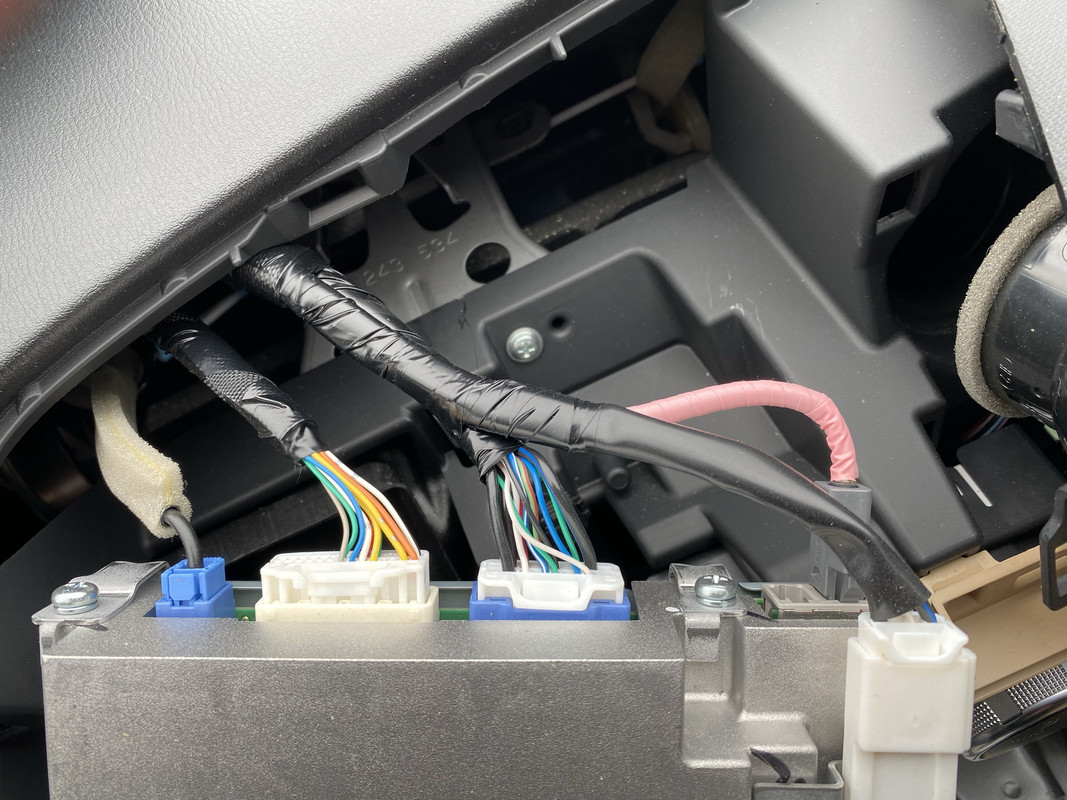 You can see is this photo the pink cable which is the old, single, USB cable and that there are two sockets in the back of the head unit ready to accept the two new cables. And here are all the bits that have been removed. 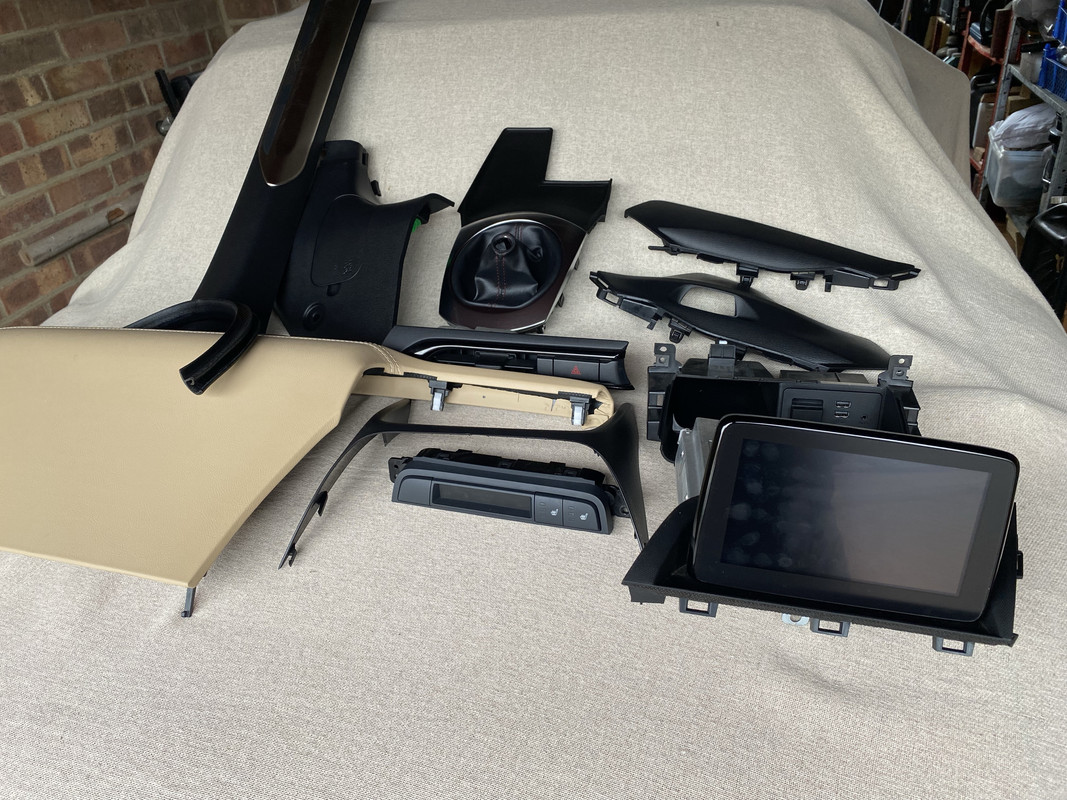 |
|
|
|
Post by mxdave on Mar 30, 2023 17:41:15 GMT
So, the next job is to feed the new, prepared, cables down through the dashboard and place the bit that has been doubled back and rapped in foam into the space behind the metal mounting frame in behind the screen. 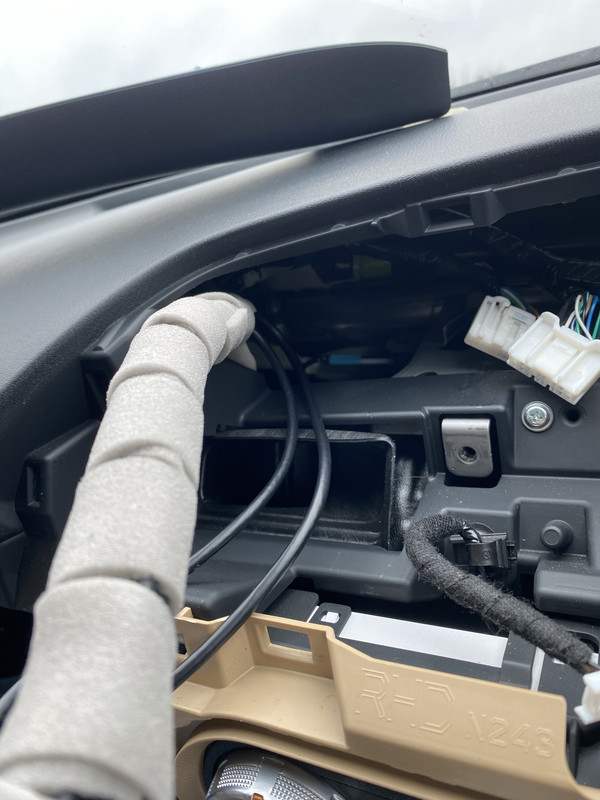 The old single USB cable can’t be removed as it runs in the existing loom so the instructions tell you to rap foam around the ends, top and bottom, and cable tie them back out of the way. 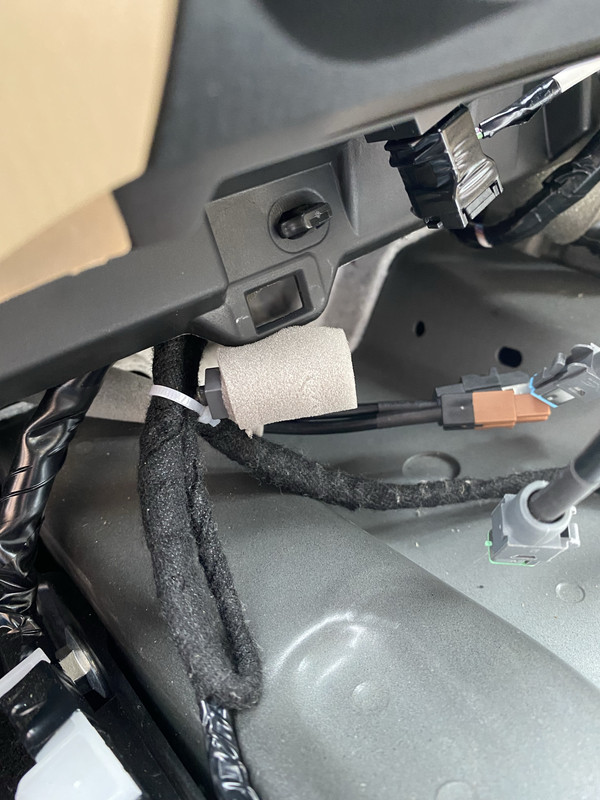 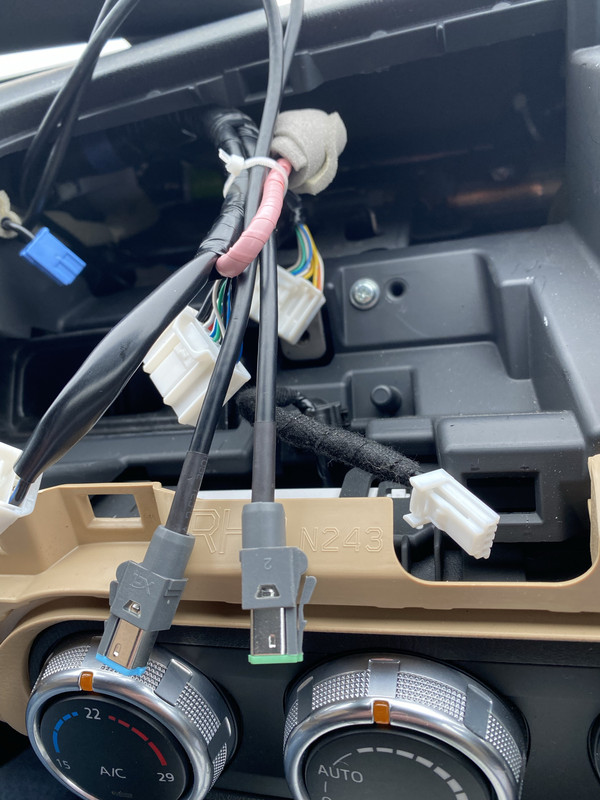 Next job is to replace the hub. The old one is slid out of its frame after releasing some clips top and bottom and then the new one can be slide in, making sure to get it the right way up. 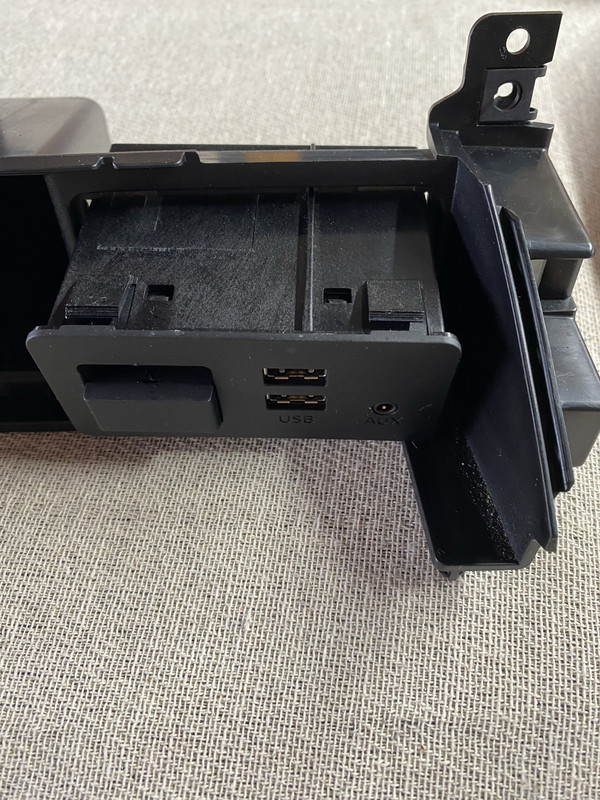 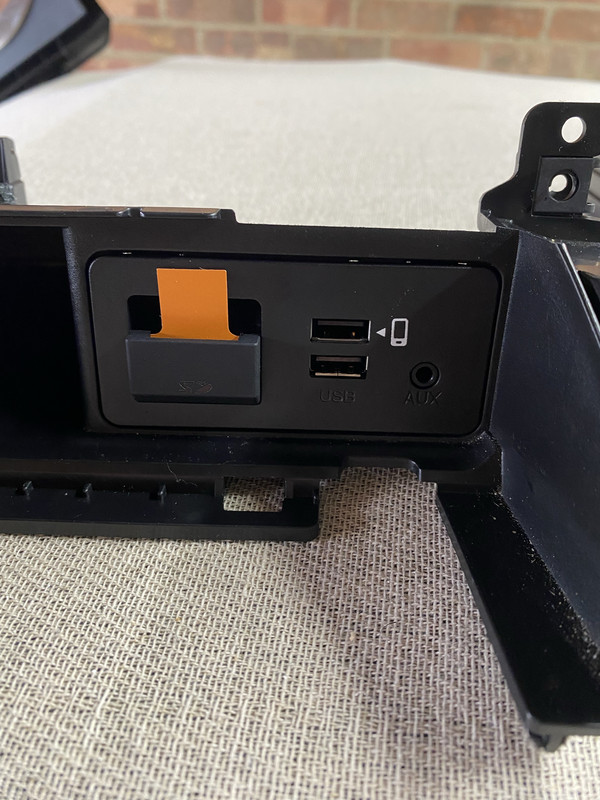 Don’t worry about the orange card this will be removed once everything is installed back in the car. This, by the way, just allows you to pull the cover off of the CD card slot where your Sat Nav card goes in and can be discarded once every thing is installed. Then it’s just a case of putting everything back in reverse order of removing. I found when I was trying to put the screen back in it was getting stuck. When I took it back out again I noticed that there’s a metal plate on the bottom of the unit that I first thought needed to slide under a plate in the dashboard but then I noticed a bit of rubber laying in the centre console which I soon realised slots onto the metal plate and rest against the plate in the dashboard to support the unit and presumably to stop it rattling. And finally, once everything is back in place you can plug in your phone, using a USB cable, into the CarPlay USB port in the hub and turn the ignition on, just on ACC to start with. Make sure you plug into the USB port with the phone symbol next it, the top one. You should see this screen.. 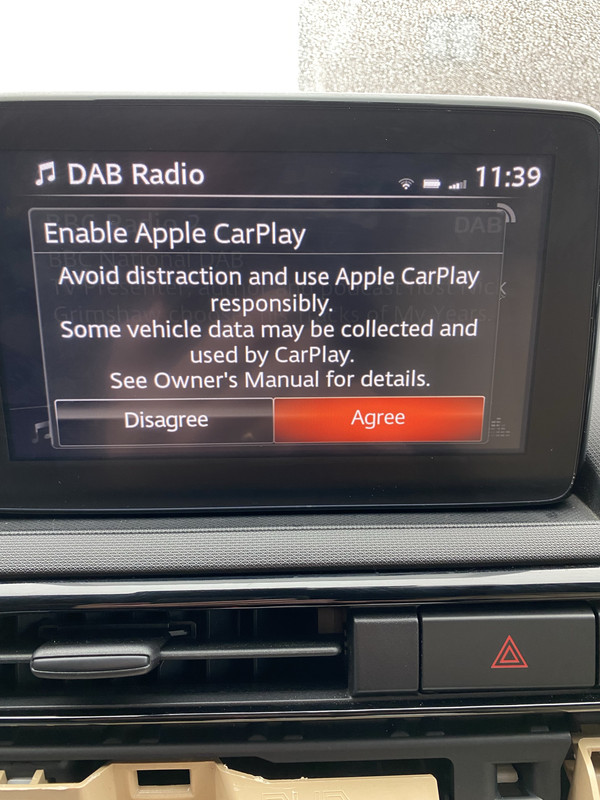 You just need to touch on agree to accept the terms. You should then be presented with a similar screen on your phone, just accept that too. Just a few screens showing CarPlay on the screen. 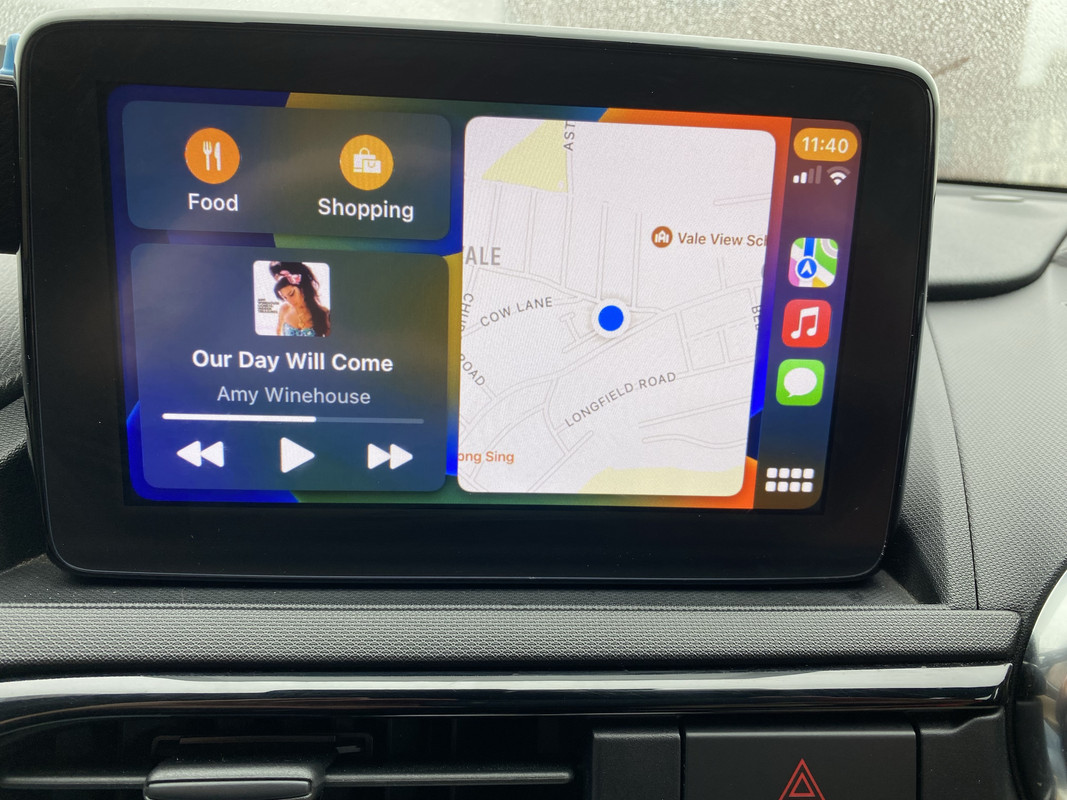 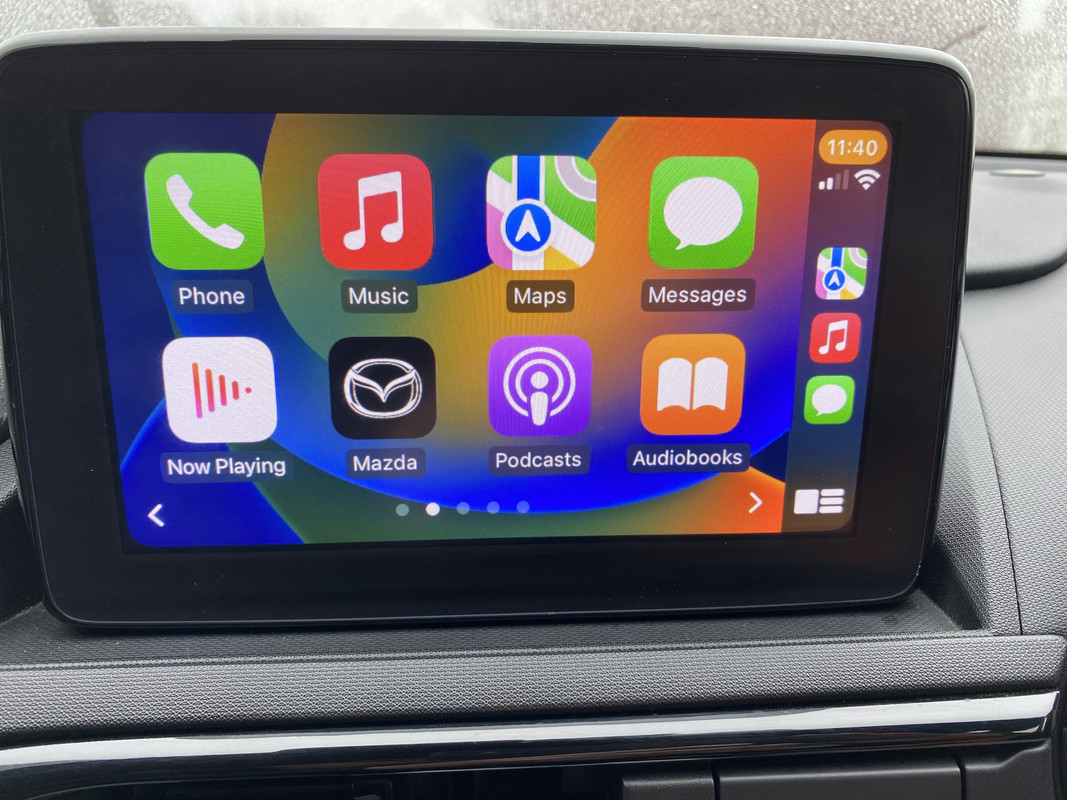 And Google maps... 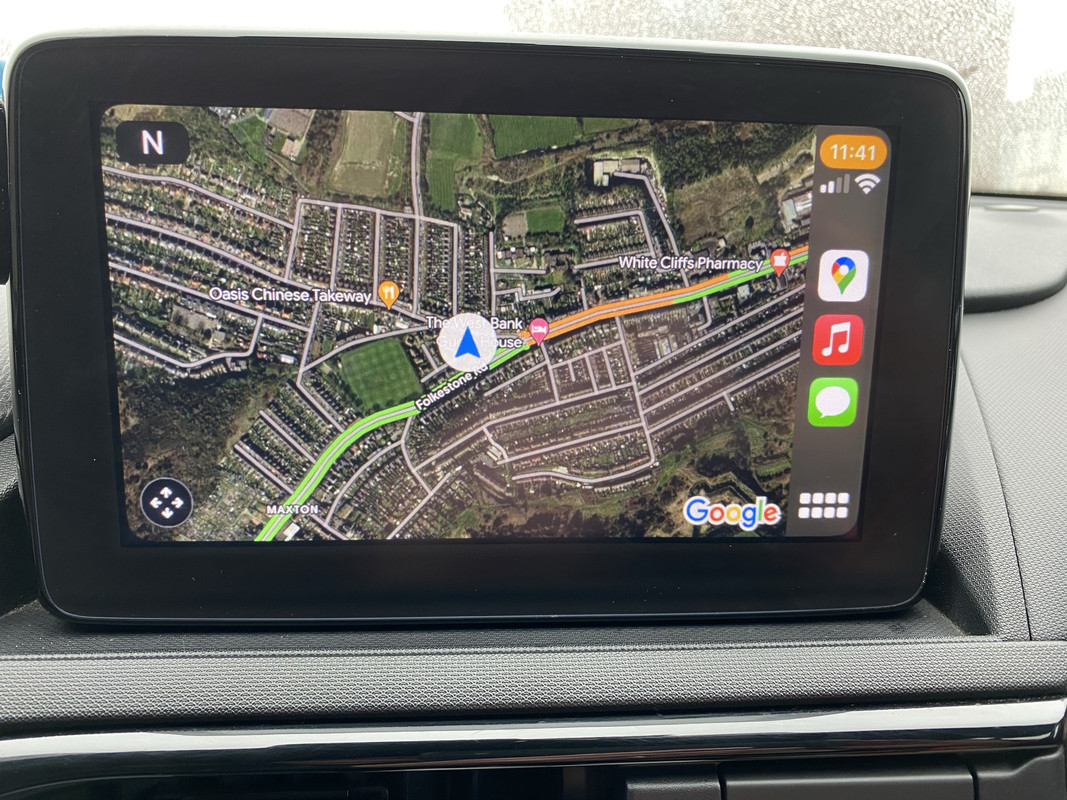 Enjoy....... Oh, by the way, although I’ve spoken about Apple CarPlay throughout this guide this upgrade allows those with an Android phone to upgrade to Android Auto. |
|
|
|
Post by Jeff - jthspace on Mar 30, 2023 19:10:13 GMT
Excellent job and write-up.
Jeff
|
|
|
|
Post by exodor on Mar 30, 2023 19:52:56 GMT
Nice one Dave. Great write up. Looking forward to you coming to Pevensey to do Wendy's car. I can supply a commode.😁
|
|
jonno
Up into 3rd gear
 🎖 Grand Tourer 2022
Posts: 74
|
Post by jonno on Mar 30, 2023 20:44:47 GMT
Well Done Dave , Bostin job  |
|
|
|
Post by mxdave on Mar 30, 2023 20:48:39 GMT
Nice one Dave. Great write up. Looking forward to you coming to Pevensey to do Wendy's car. I can supply a commode.😁  |
|
|
|
Post by Roadie on Mar 30, 2023 21:06:39 GMT
Next time I come up with a new product I think I'll outsource the instruction sheet. Brilliant job. |
|
|
|
Post by RS on Mar 31, 2023 8:16:01 GMT
Brilliant write up Dave, thanks for taking the time out to do it, I can appreciate the amount of time and effort that goes into doing a write up like that.  |
|
|
|
Post by boycie on Mar 31, 2023 8:34:24 GMT
Nice one Dave, great write up…
|
|
|
|
Post by Roadie on Mar 31, 2023 9:02:26 GMT
Quick question. Is it possible to use the Car Play / Android Auto for navigation while also playing music from a USB stick in the other socket?
|
|
|
|
Post by mxdave on Mar 31, 2023 10:12:07 GMT
Quick question. Is it possible to use the Car Play / Android Auto for navigation while also playing music from a USB stick in the other socket? Yes most definitely. That's exactly what I've been doing. The only thing that I find a little annoying is that you have to choose your music when on the standard Mazda screen then change to CarPlay for your navigation. If you want to go back to change the music playing, either another folder on your USB or on to DAB radio etc. You need to change back to the Mazda screen, change your music selection and then go back to CarPlay. This is not easy when you're driver and you can't use the touch screen, you would have to use the commander knob and buttons. But that's just a slight niggle. |
|
|
|
Post by mxdave on Mar 31, 2023 14:53:13 GMT
Since installing I have now upgraded to wireless. I bought the Carlinkit U2W Plus as shown here. Again because I'm impatient I just bought this on Amazon with next day delivery. 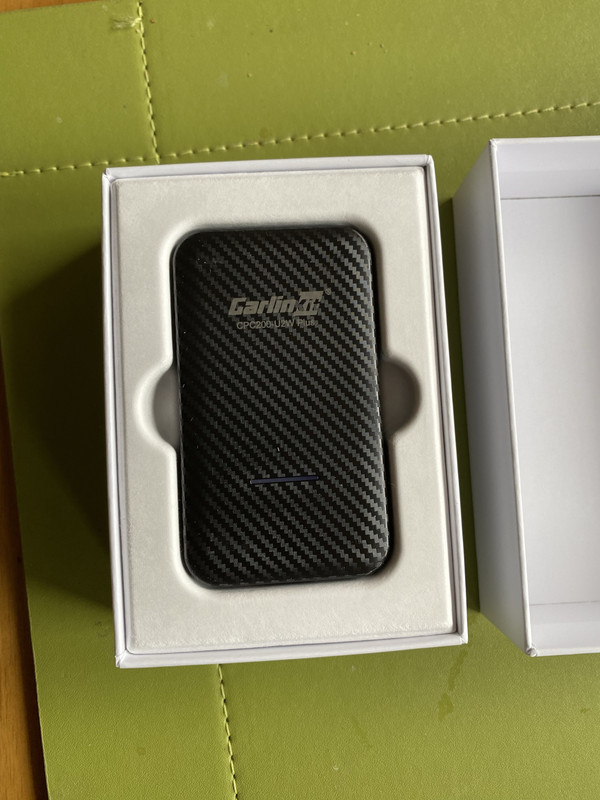 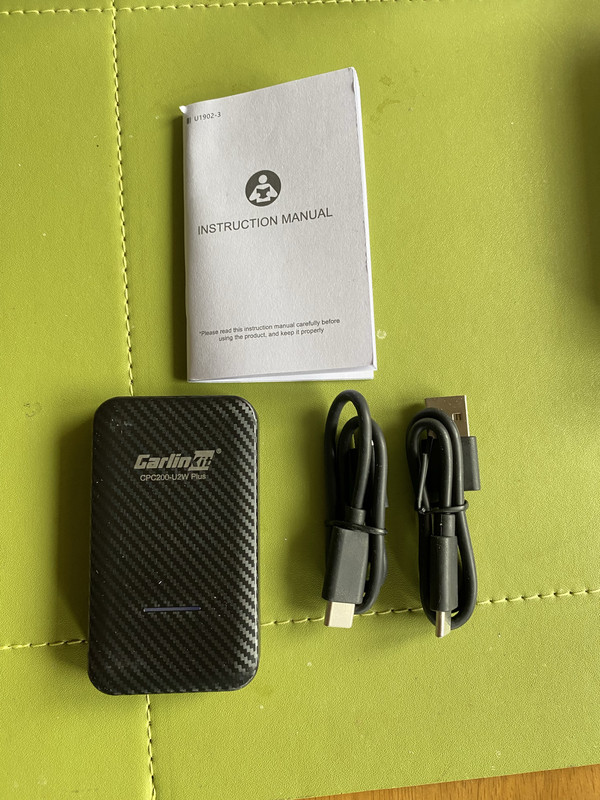 As you can see this is a very small box with a USB cable, one end plugs into the Carlinkit and the other end your CarPlay USB port in the car. It comes with two cables as some cars have a USB C port where ours has USB A. 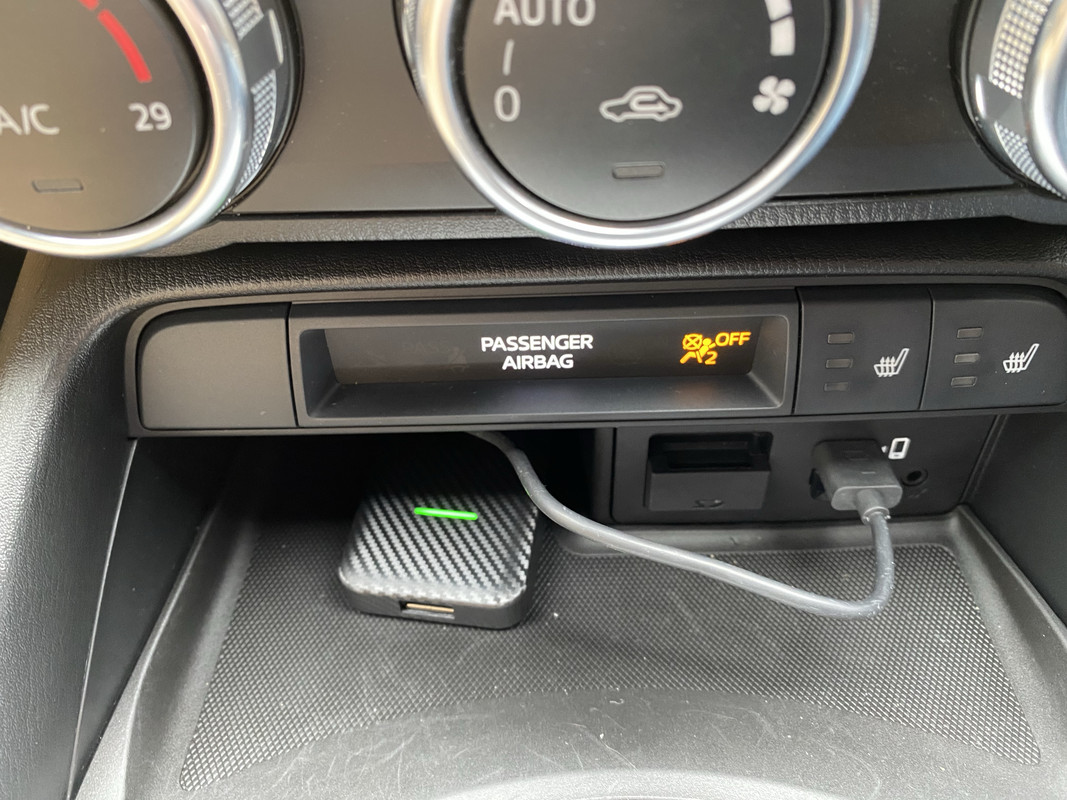 Once plugged in you just accept the terms on your car screen, connect your phone to the box by Bluetooth and you then have CarPlay while keeping your phone in you pocket or anywhere else you like to keep it. Just saves plugging your phone in every time you get in the car and unplugging when getting out. It reconnects in about 30secs after switching the car on and you then have all the usual CarPlay features. Note: Although the unit I bought is for CarPlay they also do one for Android Auto and they also do one which does both, in case you have an iPhone and an Android phone to connect at different times. |
|
|
|
Post by Jeff - jthspace on Mar 31, 2023 15:48:29 GMT
Same as the one I bought from Aliexpress. Very impressed. I've also plugged a USB A to iPhone lead in the other end to charge the phone but it only keeps it topped up rather than supplying enough to charge. The iPhone is supplying satnav, music or Tunein radio, so phone is drawing power over and above what the unit can supply in wattage to charge as well. I did tuck a high power charger in the accessory socket for emergencies though. link
It fits completely flush in tye socket. |
|