|
|
Post by Jeff - jthspace on Apr 22, 2022 21:22:23 GMT
Wow what an interesting time you've had! Really enjoyed your story so far.
|
|
|
|
Post by RS on Apr 23, 2022 10:13:27 GMT
Nice one Buggs, progress is being made.  |
|
|
|
Post by goonz on Apr 25, 2022 22:12:39 GMT
Interesting read Mr Buggs.....and I'm enjoying your progress. Question is, how many fingers will you have left by the end of this build?
|
|
|
|
Post by buggs on May 9, 2022 14:48:59 GMT
So the car has been running for a couple of weeks now on my fully tuned ECU, and I have to say I'm very pleased with it. The response from the throttle and engine seems to have improved as well as the torque, the car feels a lot faster already. Just ask Gonzo, he loved it!!! 🤣 Anyway, I said to myself this month that I'm not going to spend a penny on this build, I've spent a little bit recently but we've got a holiday coming up so I need to prioritise that.......then I get a message from a friend of mine. "Si, check out this supercharger, good price and good condition." No, I said. I have to save this month, I can't buy anything....so I bought it 🙄  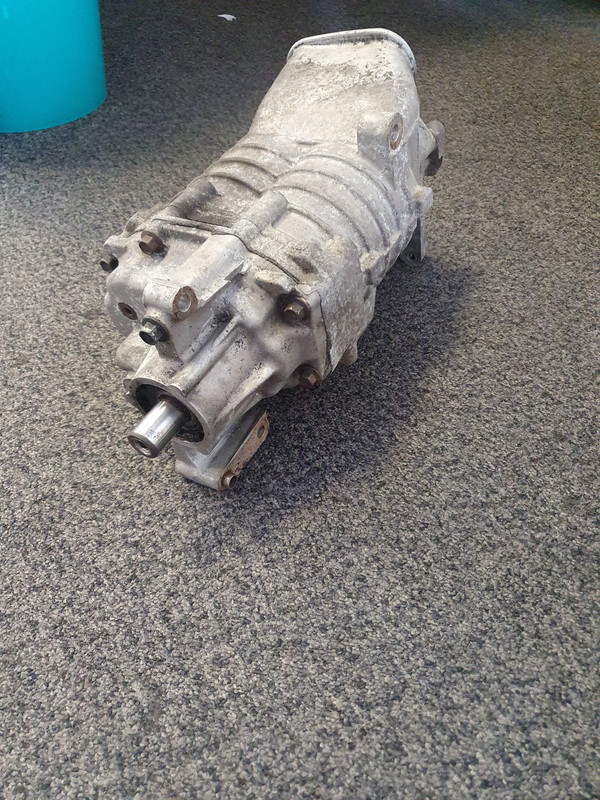 It's an M45 / R53 supercharger from a Mini Cooper, it's probably the most common to put into an MX5. The coating on the blades is coming off which can slightly reduce the power, but seen as I'm not going for super duper power on this build, it suits me. Just needs a bloody good clean and I need to buy a pulley for it. To try and gain a small amount more power out of it due to the blades missing the coating, I will be going for a reduced pulley which will spin faster, giving more power. 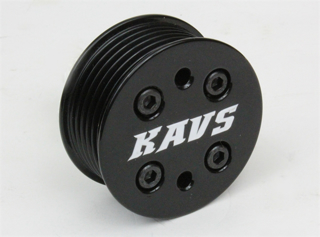 Also opened up the package that was sent to me last month containing my fitting kit, looks well past what I will be able to accomplish so that will be handed over to a local fabricator along with the supercharger for him to bend and weld for me 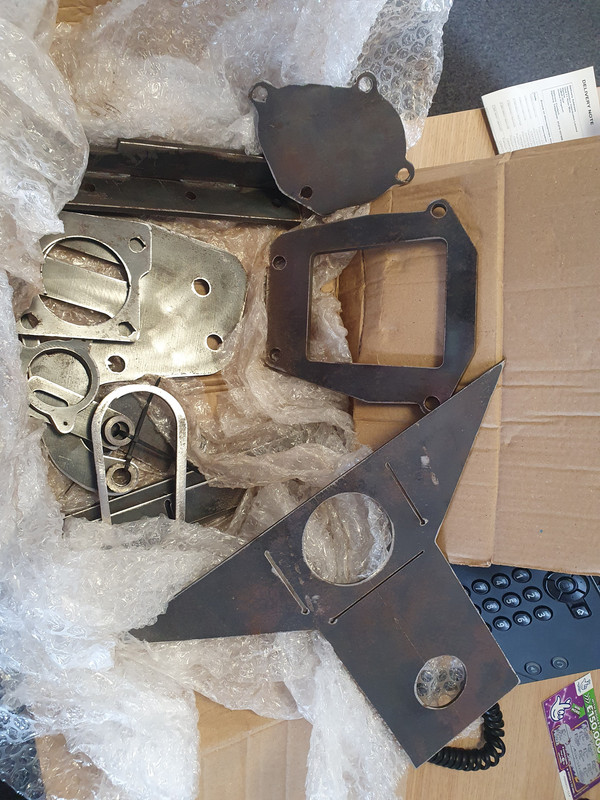 So that's where we are for now, going to try and tackle to new fuel injectors this weekend hopefully, and also try not to buy anything else!!!! |
|
|
|
Post by Roadie on May 9, 2022 16:39:12 GMT
Valerie Singleton would have had that lot together in five minutes on Blue Peter. Here's one that I made earlier. 
Never had to remove shear bolts myself but back in 2011 I managed to snap a key in my Mk1 steering lock. Local auto locksmith removed the shear bolts using a sharp cold chisel. Just tapped against the side to unscrew them. Thought he would replace them with standard bolts but he just tapped them back in!
The whole process took a couple of hours, didn't leave a mark and cut and reprogrammed a new key all for around 100 notes. Result.
|
|
|
|
Post by swannie on May 11, 2022 19:35:26 GMT
I fitted a Kavs 15% pulley to my MINI Cooper, it's made quite a noticeable difference, good move dude 👍🏼 😎
|
|
|
|
Post by buggs on Aug 9, 2022 14:28:39 GMT
It's been a while chaps and chapesses, but I've made some progress.....not much though! So the last couple of months has been a little slow, I've not had much time or spare cash to be throwing at the car lately but things should hopefully start moving again. I gave the brackets and fitting kit for the supercharger to a local fabricator and explained everything that needed to be done with pictures and measurements. "When do you need it done by?" Oh I'm not in a massive rush, take a bit of time.........4 WEEKS LATER....."Oh, I haven't started it yet." Thanks pops 🙄 Anyway, a lot of jigging around and re measuring and re welding the brackets are finally welded, and in what I believe to be, the correct positions. Haven't had a chance to properly get them on the car yet as a certain exhaust manifold nut just does not want to budge, but soon as they're on I'll get some more pics. I've just sent the fuel injectors off for a service as I've not even installed them yet, to be honest I want to paint my spare intake manifold before changing then, kill 2 birds with one stone then. However I have actually done something!!! Thr original washer bottle and bracketry will be in the way of the supercharger so have been looking at alternatives. I really want an aluminium bottle for the scuttle panel but at £150 I wasn't prepared to pay that until the build is done and I can spare some cash for it. So I've gone for a cheap simple solution, a washer bag. Doesn't look fantastic, I'm not sure how hot it might get being directly behind the supercharger but we will see, a quick and simple solution for now and looks a lot more spacious.  I've bought myself an intercooler so I've got a few bits to be getting on with so watch this space.....peace! |
|
|
|
Post by swannie on Aug 11, 2022 8:15:25 GMT
Good luck with the progress, looking forward to seeing the end product
👏🏻👏🏻😎
Swannie
|
|
|
|
Post by RS on Aug 11, 2022 10:40:30 GMT
Small step forward Buggs..... but, you're getting there....  |
|
|
|
Post by goonz on Aug 11, 2022 17:43:30 GMT
This is a great thread Buggs......keep it going
|
|
|
|
Post by swannie on Aug 12, 2022 19:58:22 GMT
Yep, keep it going, especially if you decide to sell the Typhoon intake, 🤔 😂😂 😎
|
|
|
|
Post by buggs on Aug 19, 2022 15:15:12 GMT
So this week I've managed to change my fuel injectors........what a pain in the behind!!! Swapping them over was fine, but access to them is a nightmare! So it all starts with removing the top half of the intake manifold. Nice and simple, just unplug all the vacuum lines, remove the throttle body and undo all the bolts. Just have to remember where everything goes. Started out with my old manky intake being stripped, as said not too bad of a job 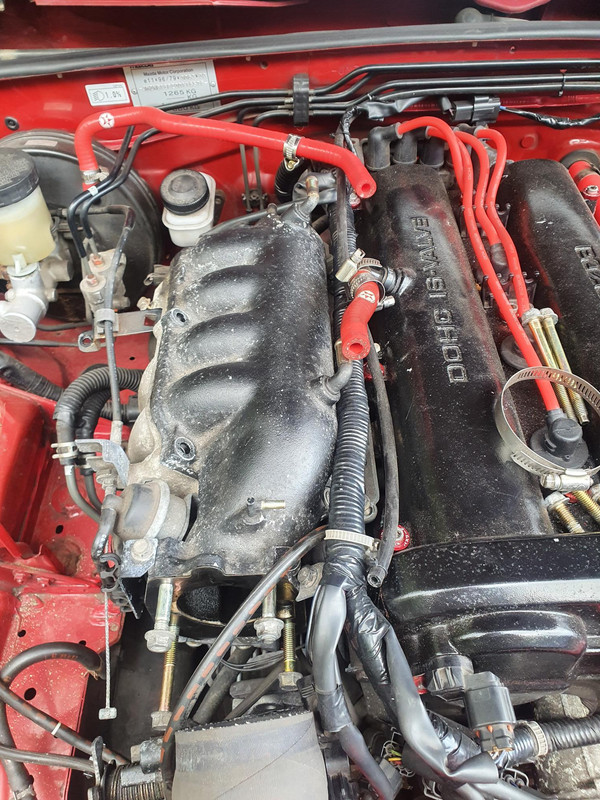 The intake was a lot more dirty with oil than I was expecting, so gave that a good clean before replacing 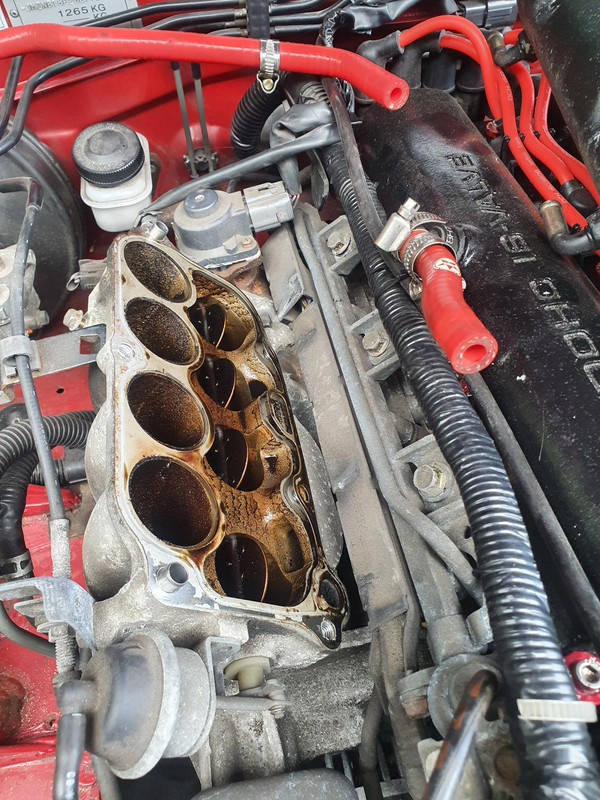 Very fiddly job to be able to access the injectors. First off you have to remove the fuel rail which is held onto the injector bracket by 2 clips, easy to take the clips off once you manage to get access to them. They are facing down into the engine between the intake and the engine block, managed to pry them out with a screwdriver as the long nose pliers just couldn't get the access to them. Once they were taken off, it needs to be pulled back as far as possible, which isn't a lot, so you can access the clips for the injectors. There really isn't much space but you need to get your fingers in between the fuel rail and the bracket to unclip the injectors, the clips are a nightmare to get off but eventually they were released (with one of the clips being broken but thankfully it's managed to stay on). When the clips are off you can go ahead and undo the 3 bolts holding the bracket on. This is where you have to be very careful as behind the bolts are 3 plastic spacers, these spacers love to get lost!! Thankfully on taking them off they managed to stay where they are and I kept hold of them in a safe place. Once the bolts and the spacers are off then you can just prize the bracket round bringing the injectors with them 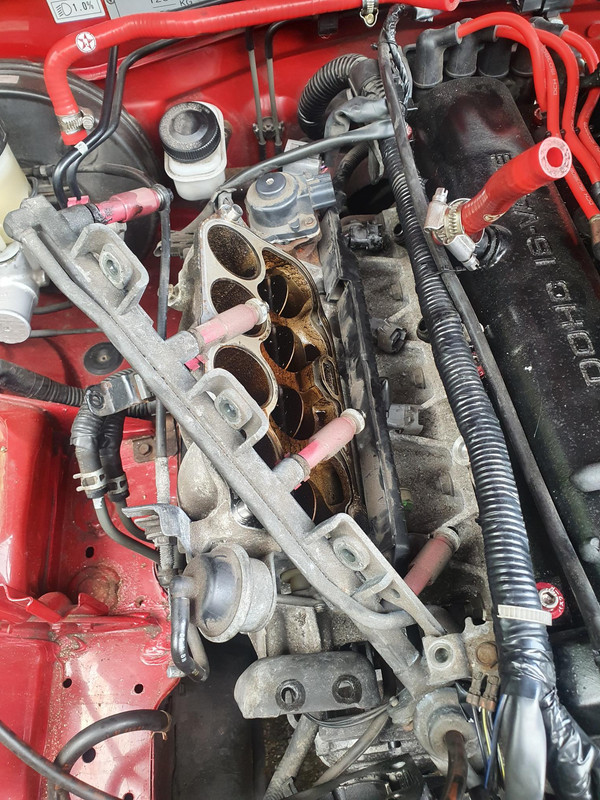 The injectors are held in by a small rubber ring so removing them is just a case of giving it a good pull. The car hasn't been used for a couple of weeks so I was hoping that there would be very little fuel in the line when I took the injectors off, and starting at injector number 1 (the one closest to the engine) I began. Popped number 1 off and fuel poured everywhere, great!! Quickly threw my rag down and mopped most of it up, there wasn't too much but more than I was expecting. Number 2, 3 and 4 were nice and simple and very little fuel lost after that. 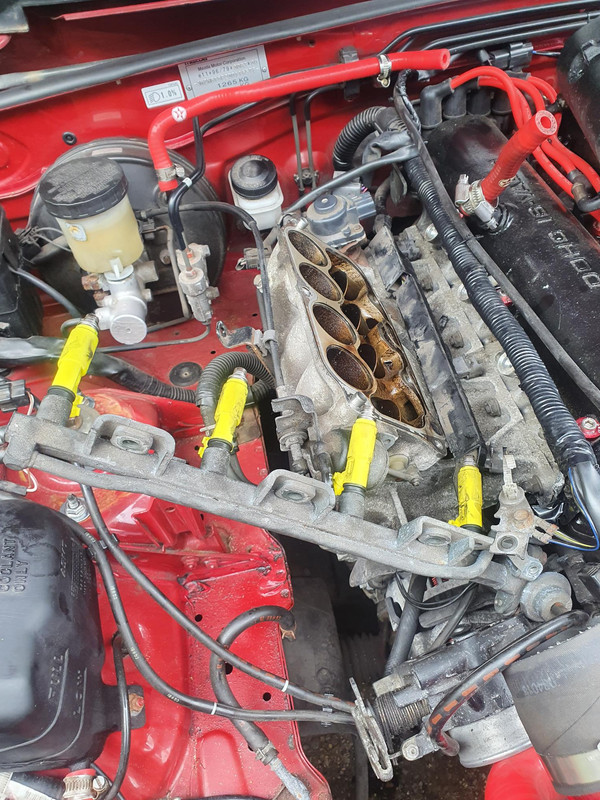 With the injectors replaced and the new washers and seals for them in place, it was just a case of lining the injectors up, slotting them in and bolting it all back up. You remember the 3 plastic spacers I told you about? Yeah.......they went bye bye!! Trying to put them nice and carefully back in place and they just kept slipping out of my fingers. Thankfully I removed the undertray for later access to the radiator so they just plonked straight to the floor. Finally got them seated with a little blob of grease and we could crack on, plugged the plugs back in the injectors which was just as fiddly as taking them off, then seated the fuel rail and clipped back in place. 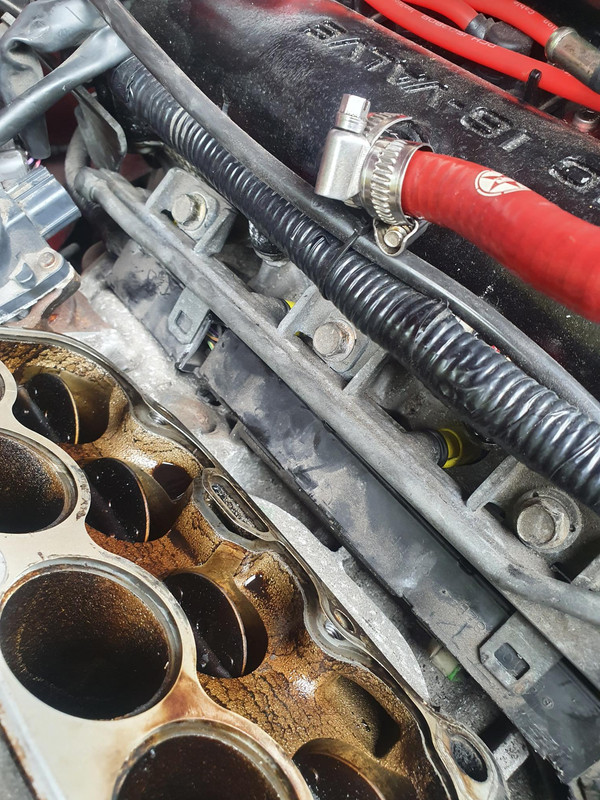 Cycled the ignition a few times to check for any leaks as this is quite common when replacing the injectors, normally just a case of re seating them in the washers but luckily, I had no issues. It all looked good. Fitted a freshly painted top part of the intake manifold, bolted everything back down and plugged everything back in and job almost done!  Once this is all done, it's just a case of connecting to the ECU with the laptop, loading up the software and changing the injector sizes to 420cc and saving. Switch the ignition off and then it's time to try and start it  The car fired up straight away, seemed to run pretty well. A quick run round to the engine bay to make sure there was no petrol spraying out anywhere and it all looked good. So, once all that was sorted, I thought sod it, I'm putting the supercharger on and having a test fit. The brackets I've had welded for me seemed to fit pretty well thankfully, part of it needs cutting off to make it look better but I'm happy with it. 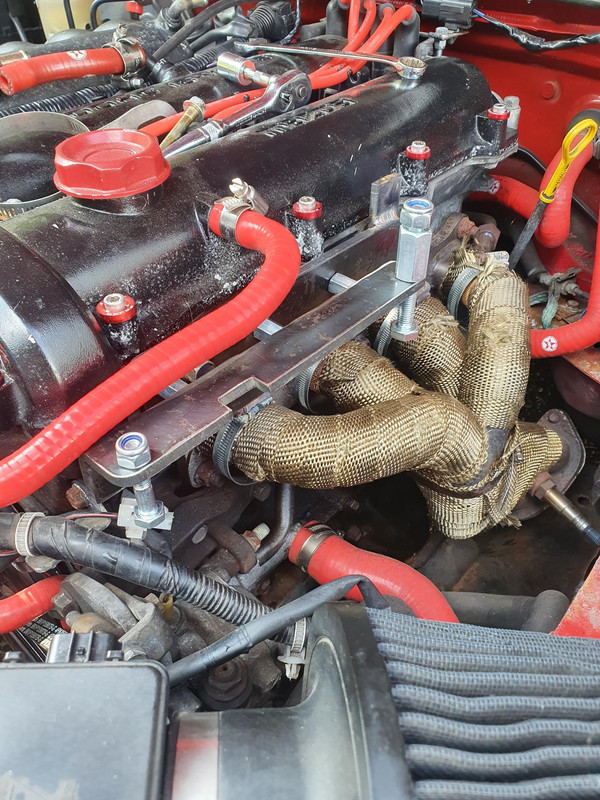 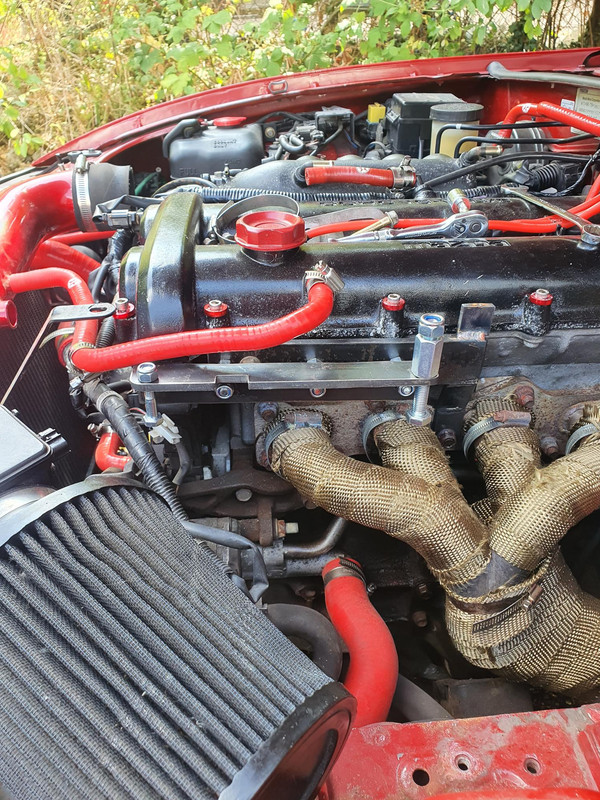 Next was the supercharger, so a couple of bolts to hold that on and also quickly put the inlet and outlet pipes on to make sure it all fits. The outlet pipe that goes to the intercooler is veeeeery long as I wasn't sure how long it needed to be, but longer is better that way I can cut it down to what I need it to be. 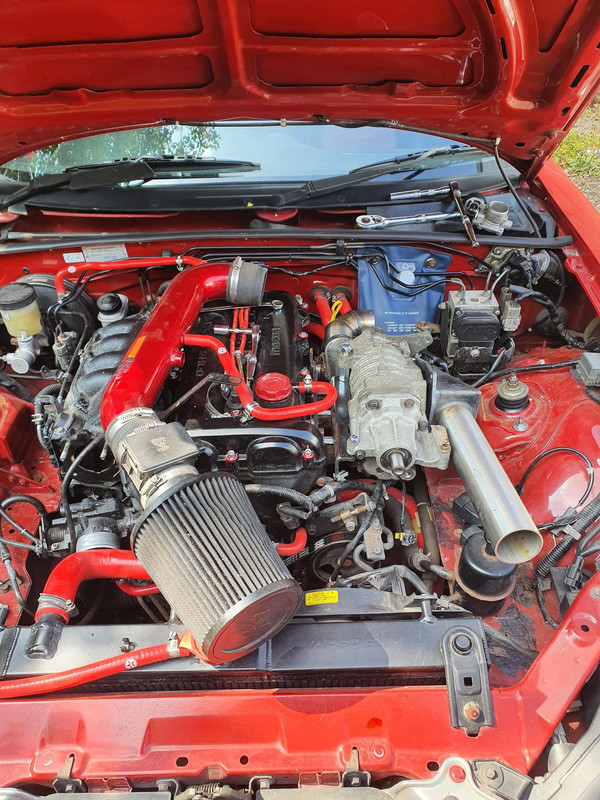 So all in all it's been a slightly busy week, baring in mind most of this has been done on lunch breaks at work  But I'm happy with my progress, now I need to start working out on how I'm going to seat the intercooler. Once that is done I think I'm pretty much on the home stretch. |
|
|
|
Post by fivedriver on Aug 29, 2022 20:48:08 GMT
Great progress. Thanks for sharing the step by step.👍
|
|
|
|
Post by buggs on Oct 4, 2022 18:59:33 GMT
Hey guys and gals, another little update for you. Haven't managed much to be fair, haven't had much free time but I'm almost at the point where its just bolting on and firing it up! So firstly I thought I'd give the supercharger a bit of a better look than the drab dirty shade it's currently got. I used a black rust protector spray paint that I got for the fitting kit to stop it rusting up. Came out really nice on the pipe work so thought I'd give it a go on the supercharger 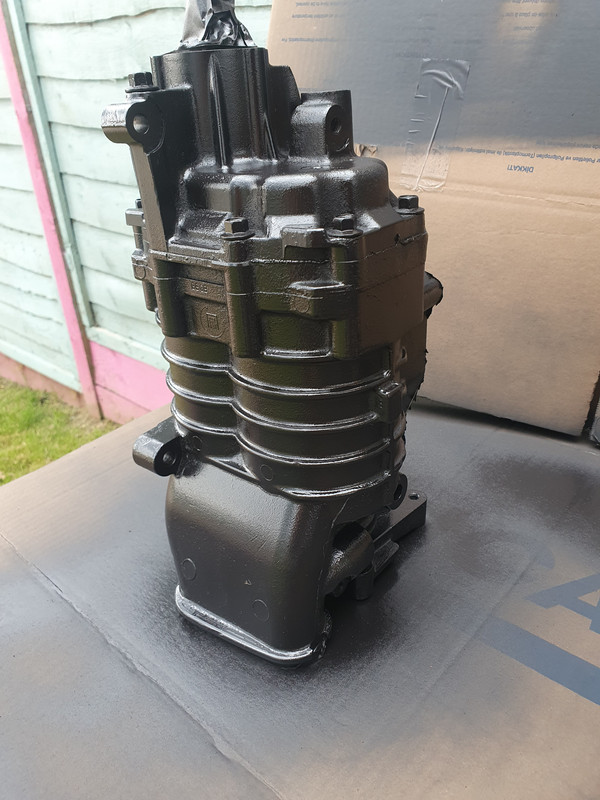 Very happy with that result, looks a million times better. Afterwards I went ahead and bolted all the parts to the supercharger, using an RTV sealant around all the joins to make sure there are no leaks, fitted the new reduction pulley to the front and changed the oil in the snout so its fresh and its ready to be bolted to the car  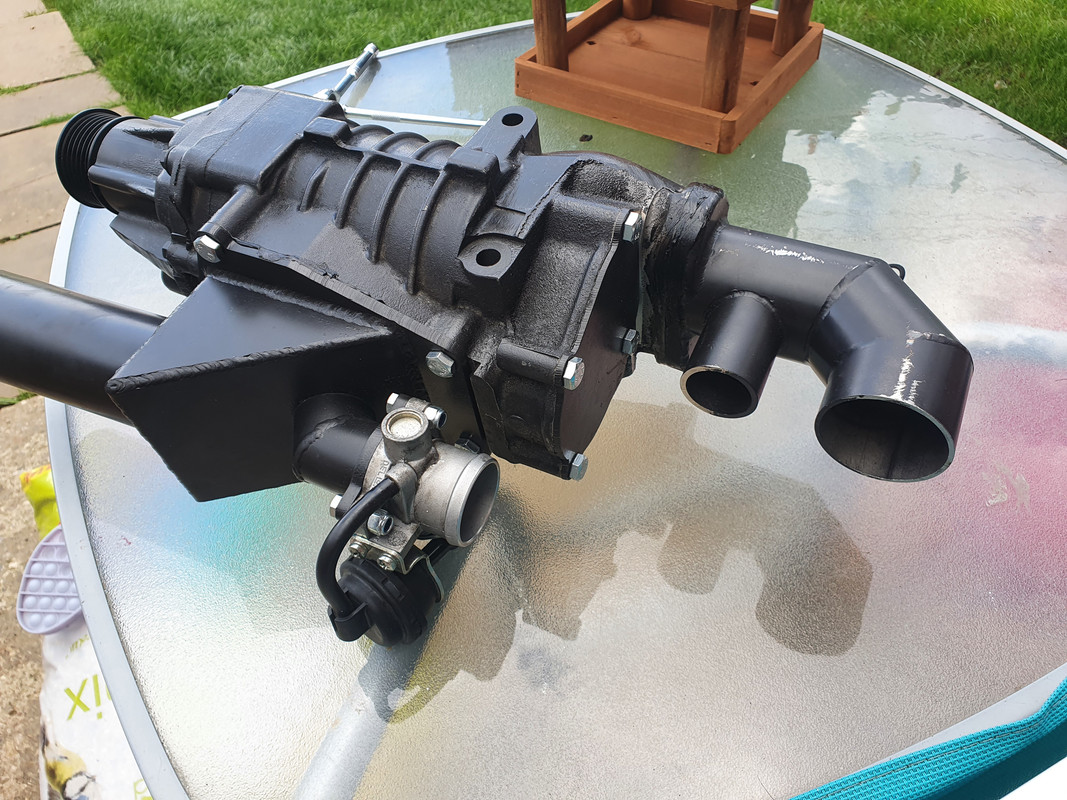 The next job I'm currently tackling is the issue of the radiator. Due to my decision to have the intercooler pipes running over the top of the radiator, as I think it looks cooler, I need to lower it into the car. There is a simple solution to this, I've removed the radiator brackets with the idea of using the anti roll bar mount screws just below it The top 2 bolts are the original position of the radiator brackets, I'm planning on using the lower 2 on each side 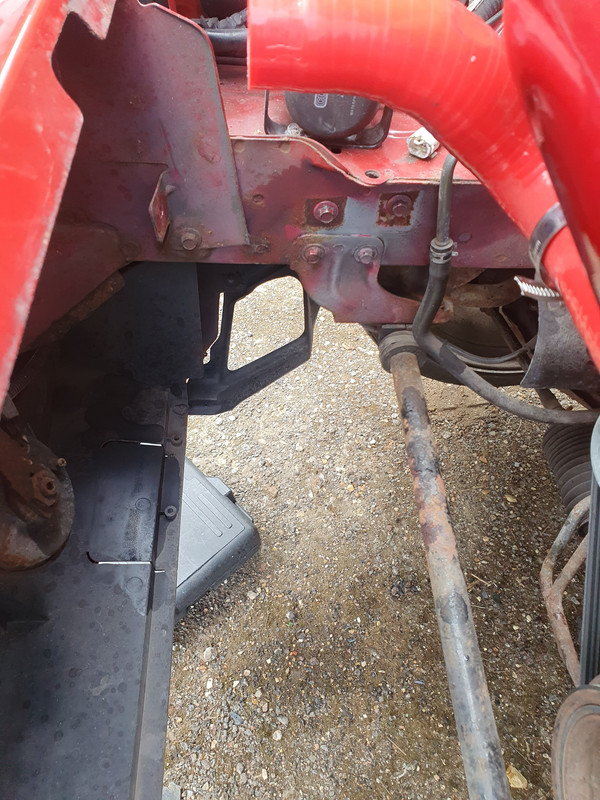 One of the holes for each bracket need elongating which I'm currently trying to do, alot of trial and error to get the buggers to fit, not to mention needing longer bolts and spacers as when you move it down parts of the chassis rails start to get in the way. I also gave these a rub down and a spray with the rust protector paint  gas stations near me that still have gas gas stations near me that still have gasGave thenm a quick test fit today, need to be made slightly wider and they will fit. Only issue I'll have then is the power steering pipes. Lowering the bracket on the passenger side puts the pipes right in the way, I've watched a couple of videos of just making a small adjustment to the bracket and they will fit. For some reason looks a bit more complicated on mine, doesn't look like I've got as much room to play with 🤔 But thats where we are at the moment, as soon as the brackets are back in I can see how I want to mount the intercooler which shouldn't be too much of a job. Then it will be putting the pipes on, fitting a new IAT sensor and the blow off valve and bosh, we will hopefully be ready for a fire up! Mind you I did kind of blow my exhaust the other day 🙄 the car hadn't been started for a few weeks, it failed to start on the first try as I think the battery is a bit naff. On the 2nd attempt it seemed to backfire. After about 10 minutes of letting it run, I went round to the back of the car and heard quite a loud ticking/clacking noise. I can only assume I've blown a hole in a joint or maybe loosened the silencer in the back box. Once the radiator is back in I can properly check it but as the sound is coming mainly from the back I'm hoping it's the back box, will give me a good reason for buying a twin exit one!! I'll give another update once the intercooler is in, adios! |
|
|
|
Post by exodor on Oct 5, 2022 11:12:37 GMT
Nice one Buggs.
I had a similar thing with my back box. Baffle rattling. I made a few adjustments with a hammer to make it fit snugger. 😁
|
|